# Using the [SO-100](https://github.com/TheRobotStudio/SO-ARM100) with LeRobot
## Table of Contents
- [A. Source the parts](#a-source-the-parts)
- [B. Install LeRobot](#b-install-lerobot)
- [C. Configure the Motors](#c-configure-the-motors)
- [D. Step-by-Step Assembly Instructions](#d-step-by-step-assembly-instructions)
- [E. Calibrate](#e-calibrate)
- [F. Teleoperate](#f-teleoperate)
- [G. Record a dataset](#g-record-a-dataset)
- [H. Visualize a dataset](#h-visualize-a-dataset)
- [I. Replay an episode](#i-replay-an-episode)
- [J. Train a policy](#j-train-a-policy)
- [K. Evaluate your policy](#k-evaluate-your-policy)
- [L. More Information](#l-more-information)
## A. Source the parts
Follow this [README](https://github.com/TheRobotStudio/SO-ARM100). It contains the bill of materials, with a link to source the parts, as well as the instructions to 3D print the parts,
and advice if it's your first time printing or if you don't own a 3D printer.
Before assembling, you will first need to configure your motors. To this end, we provide a nice script, so let's first install LeRobot. After configuration, we will also guide you through assembly.
## B. Install LeRobot
> [!TIP]
> We use the Command Prompt (cmd) quite a lot. If you are not comfortable using the cmd or want to brush up using the command line you can have a look here: [Command line crash course](https://developer.mozilla.org/en-US/docs/Learn_web_development/Getting_started/Environment_setup/Command_line)
On your computer:
#### 1. [Install Miniconda](https://docs.anaconda.com/miniconda/install/#quick-command-line-install):
#### 2. Restart shell
Copy paste in your shell: `source ~/.bashrc` or for Mac: `source ~/.bash_profile` or `source ~/.zshrc` if you're using zshell
#### 3. Create and activate a fresh conda environment for lerobot
Video install instructions
```bash
conda create -y -n lerobot python=3.10
```
Then activate your conda environment (do this each time you open a shell to use lerobot!):
```bash
conda activate lerobot
```
#### 4. Clone LeRobot:
```bash
git clone https://github.com/huggingface/lerobot.git ~/lerobot
```
#### 5. Install LeRobot with dependencies for the feetech motors:
```bash
cd ~/lerobot && pip install --no-binary=av -e ".[feetech]"
```
Great :hugs:! You are now done installing LeRobot and we can begin assembling the SO100 arms :robot:.
Every time you now want to use LeRobot you can go to the `~/lerobot` folder where we installed LeRobot and run one of the commands.
## C. Configure the motors
> [!NOTE]
> Throughout this tutorial you will find videos on how to do the steps, the full video tutorial can be found here: [assembly video](https://www.youtube.com/watch?v=FioA2oeFZ5I).
### 1. Find the USB ports associated to each arm
Designate one bus servo adapter and 6 motors for your leader arm, and similarly the other bus servo adapter and 6 motors for the follower arm. It's convenient to label them and write on each motor if it's for the follower `F` or for the leader `L` and it's ID from 1 to 6 (F1...F6 and L1...L6).
#### a. Run the script to find port
Video finding port
To find the port for each bus servo adapter, run the utility script:
```bash
python lerobot/scripts/find_motors_bus_port.py
```
#### b. Example outputs
Example output when identifying the leader arm's port (e.g., `/dev/tty.usbmodem575E0031751` on Mac, or possibly `/dev/ttyACM0` on Linux):
```
Finding all available ports for the MotorBus.
['/dev/tty.usbmodem575E0032081', '/dev/tty.usbmodem575E0031751']
Remove the usb cable from your MotorsBus and press Enter when done.
[...Disconnect leader arm and press Enter...]
The port of this MotorsBus is /dev/tty.usbmodem575E0031751
Reconnect the usb cable.
```
Example output when identifying the follower arm's port (e.g., `/dev/tty.usbmodem575E0032081`, or possibly `/dev/ttyACM1` on Linux):
```
Finding all available ports for the MotorBus.
['/dev/tty.usbmodem575E0032081', '/dev/tty.usbmodem575E0031751']
Remove the usb cable from your MotorsBus and press Enter when done.
[...Disconnect follower arm and press Enter...]
The port of this MotorsBus is /dev/tty.usbmodem575E0032081
Reconnect the usb cable.
```
#### c. Troubleshooting
On Linux, you might need to give access to the USB ports by running:
```bash
sudo chmod 666 /dev/ttyACM0
sudo chmod 666 /dev/ttyACM1
```
#### d. Update config file
IMPORTANTLY: Now that you have your ports, update the **port** default values of [`SO100RobotConfig`](../lerobot/common/robot_devices/robots/configs.py). You will find something like:
```python
@RobotConfig.register_subclass("so100")
@dataclass
class So100RobotConfig(ManipulatorRobotConfig):
calibration_dir: str = ".cache/calibration/so100"
# `max_relative_target` limits the magnitude of the relative positional target vector for safety purposes.
# Set this to a positive scalar to have the same value for all motors, or a list that is the same length as
# the number of motors in your follower arms.
max_relative_target: int | None = None
leader_arms: dict[str, MotorsBusConfig] = field(
default_factory=lambda: {
"main": FeetechMotorsBusConfig(
port="/dev/tty.usbmodem58760431091", <-- UPDATE HERE
motors={
# name: (index, model)
"shoulder_pan": [1, "sts3215"],
"shoulder_lift": [2, "sts3215"],
"elbow_flex": [3, "sts3215"],
"wrist_flex": [4, "sts3215"],
"wrist_roll": [5, "sts3215"],
"gripper": [6, "sts3215"],
},
),
}
)
follower_arms: dict[str, MotorsBusConfig] = field(
default_factory=lambda: {
"main": FeetechMotorsBusConfig(
port="/dev/tty.usbmodem585A0076891", <-- UPDATE HERE
motors={
# name: (index, model)
"shoulder_pan": [1, "sts3215"],
"shoulder_lift": [2, "sts3215"],
"elbow_flex": [3, "sts3215"],
"wrist_flex": [4, "sts3215"],
"wrist_roll": [5, "sts3215"],
"gripper": [6, "sts3215"],
},
),
}
)
```
### 2. Assembling the Base
Let's begin with assembling the follower arm base
#### a. Set IDs for all 12 motors
Video configuring motor
Plug your first motor F1 and run this script to set its ID to 1. It will also set its present position to 2048, so expect your motor to rotate. Replace the text after --port to the corresponding follower control board port and run this command in cmd:
```bash
python lerobot/scripts/configure_motor.py \
--port /dev/tty.usbmodem58760432961 \
--brand feetech \
--model sts3215 \
--baudrate 1000000 \
--ID 1
```
> [!NOTE]
> These motors are currently limited. They can take values between 0 and 4096 only, which corresponds to a full turn. They can't turn more than that. 2048 is at the middle of this range, so we can take -2048 steps (180 degrees anticlockwise) and reach the maximum range, or take +2048 steps (180 degrees clockwise) and reach the maximum range. The configuration step also sets the homing offset to 0, so that if you misassembled the arm, you can always update the homing offset to account for a shift up to ± 2048 steps (± 180 degrees).
Then unplug your motor and plug the second motor and set its ID to 2.
```bash
python lerobot/scripts/configure_motor.py \
--port /dev/tty.usbmodem58760432961 \
--brand feetech \
--model sts3215 \
--baudrate 1000000 \
--ID 2
```
Redo the process for all your motors until ID 6. Do the same for the 6 motors of the leader arm.
#### b. Remove the gears of the 6 leader motors
Video removing gears
Follow the video for removing gears. You need to remove the gear for the motors of the leader arm. As a result, you will only use the position encoding of the motor and reduce friction to more easily operate the leader arm.
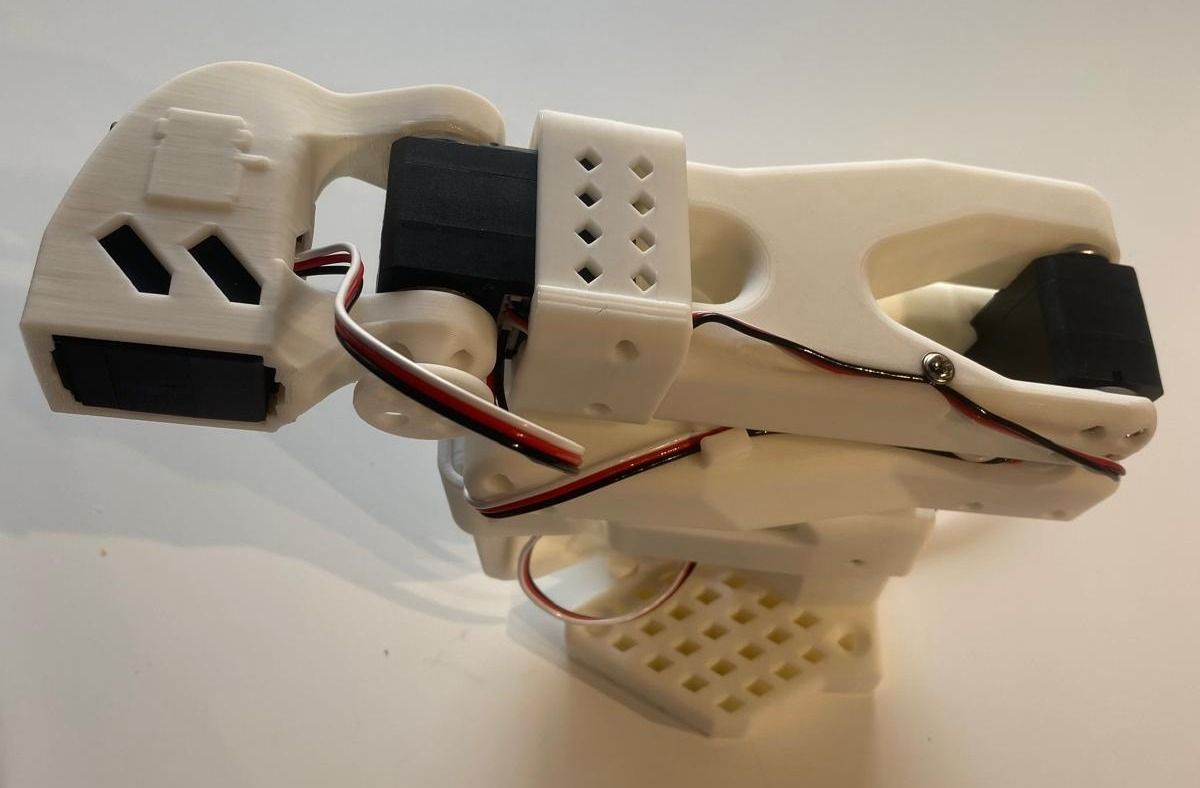
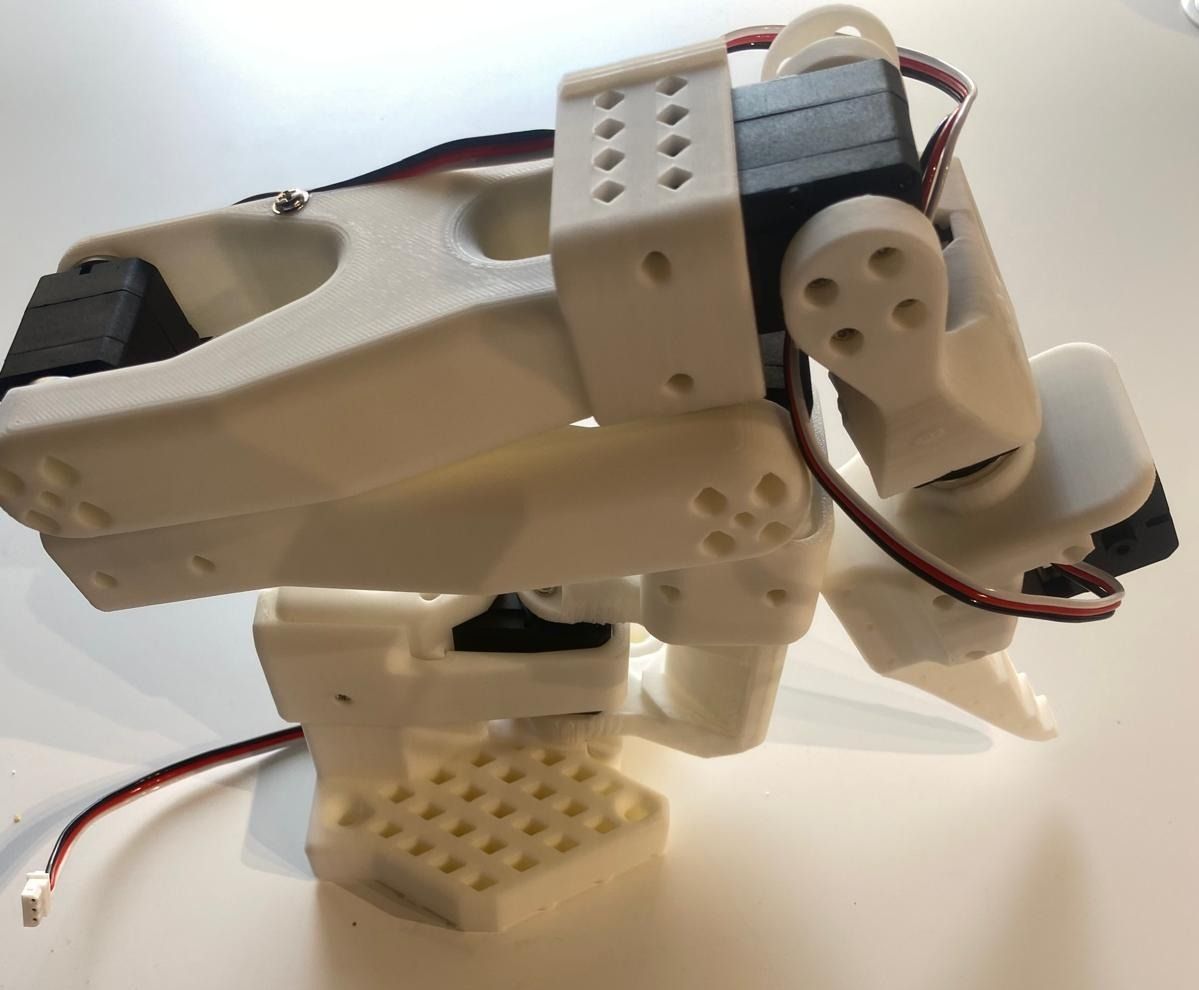
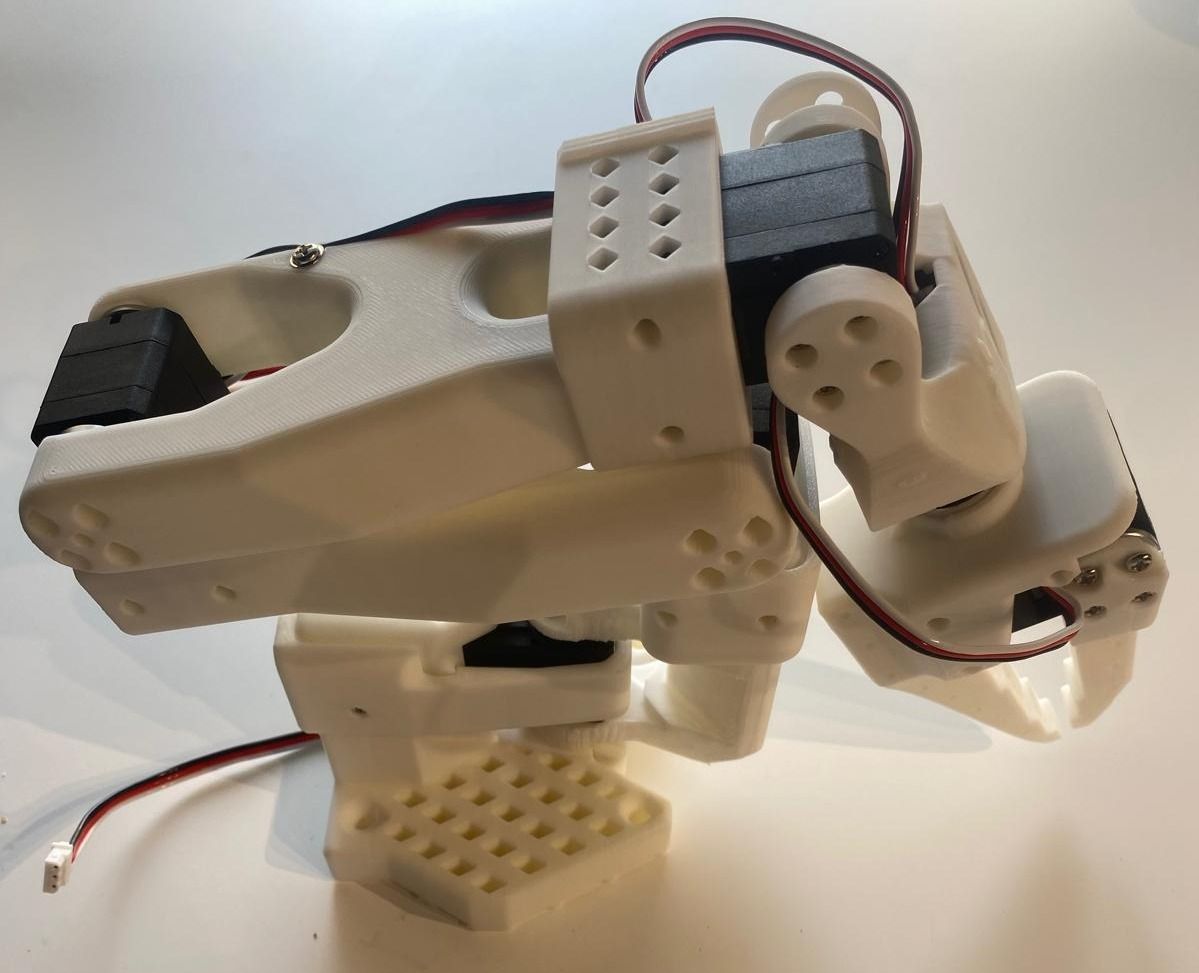
## D. Step-by-Step Assembly Instructions
**Step 1: Clean Parts**
- Remove all support material from the 3D-printed parts.
---
### Additional Guidance
Video assembling arms
**Note:**
This video provides visual guidance for assembling the arms, but it doesn't specify when or how to do the wiring. Inserting the cables beforehand is much easier than doing it afterward. The first arm may take a bit more than 1 hour to assemble, but once you get used to it, you can assemble the second arm in under 1 hour.
---
### First Motor
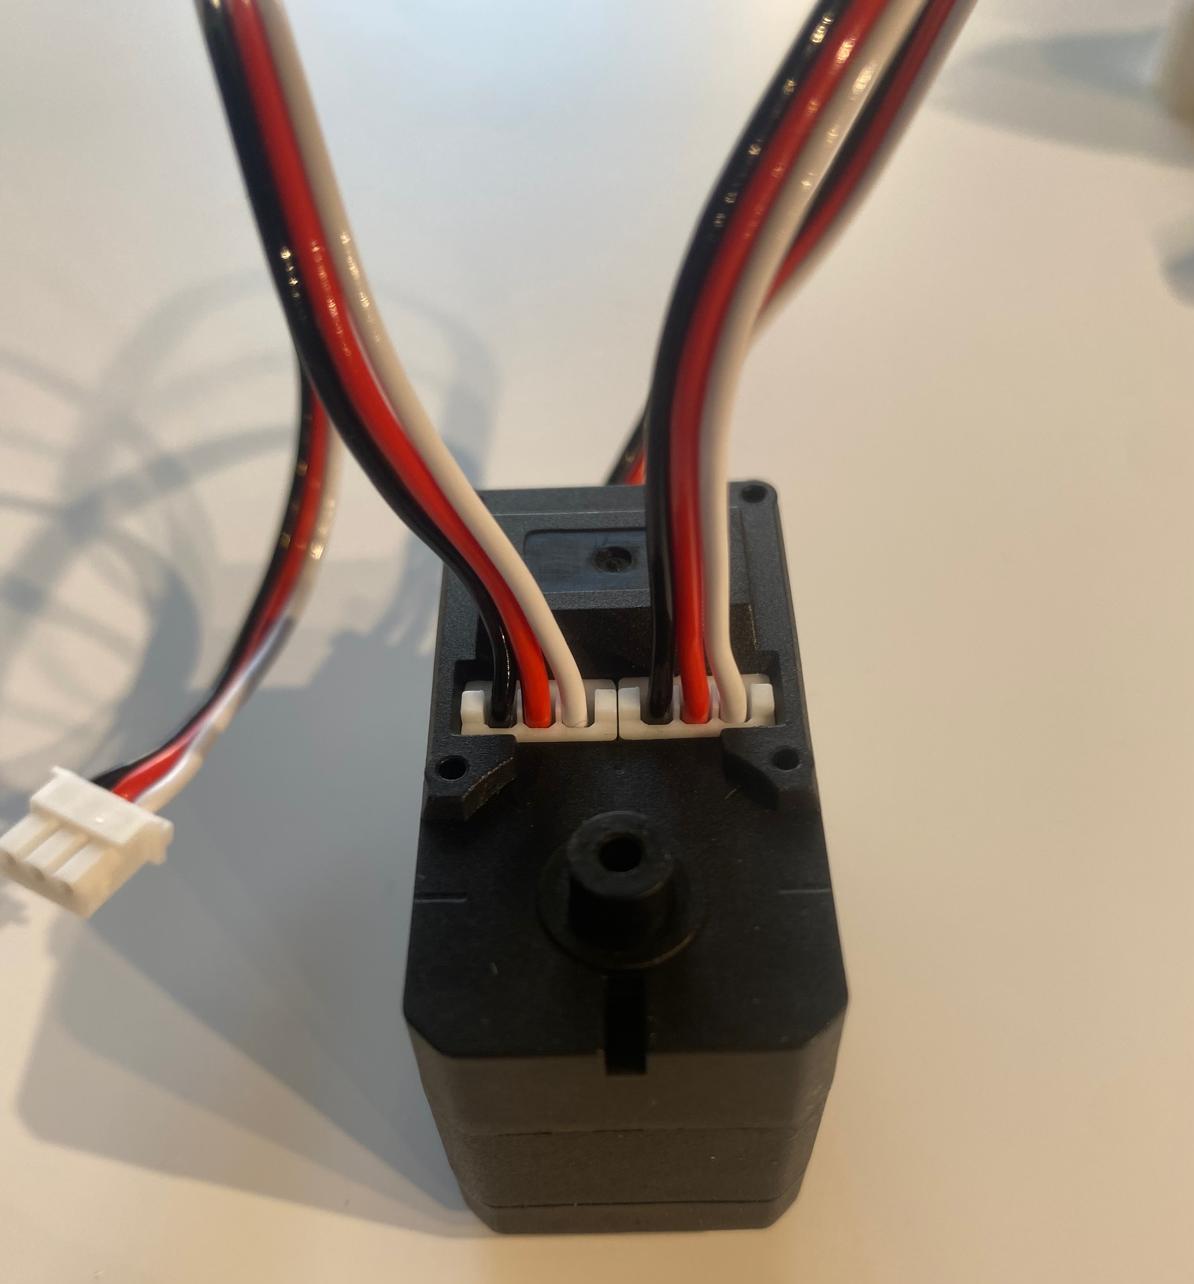
**Step 2: Insert Wires**
- Insert two wires into the first motor.
 **Step 3: Install in Base**
- Place the first motor into the base.
**Step 3: Install in Base**
- Place the first motor into the base.
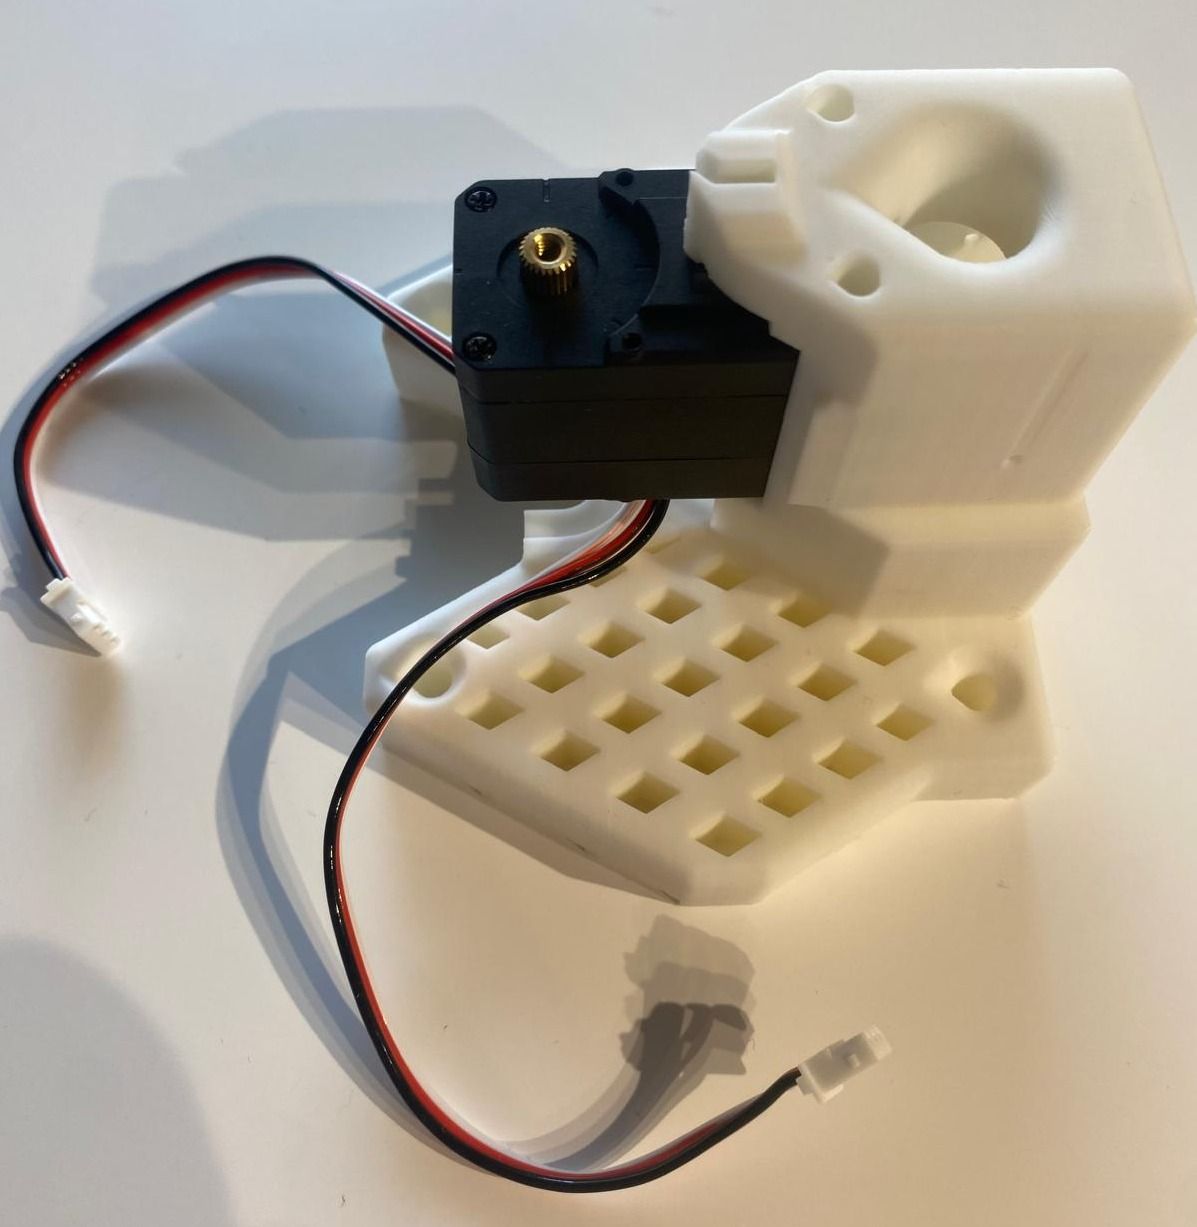 **Step 4: Secure Motor**
- Fasten the motor with 4 screws. Two from the bottom and two from top.
**Step 5: Attach Motor Holder**
- Slide over the first motor holder and fasten it using two screws (one on each side).
**Step 4: Secure Motor**
- Fasten the motor with 4 screws. Two from the bottom and two from top.
**Step 5: Attach Motor Holder**
- Slide over the first motor holder and fasten it using two screws (one on each side).
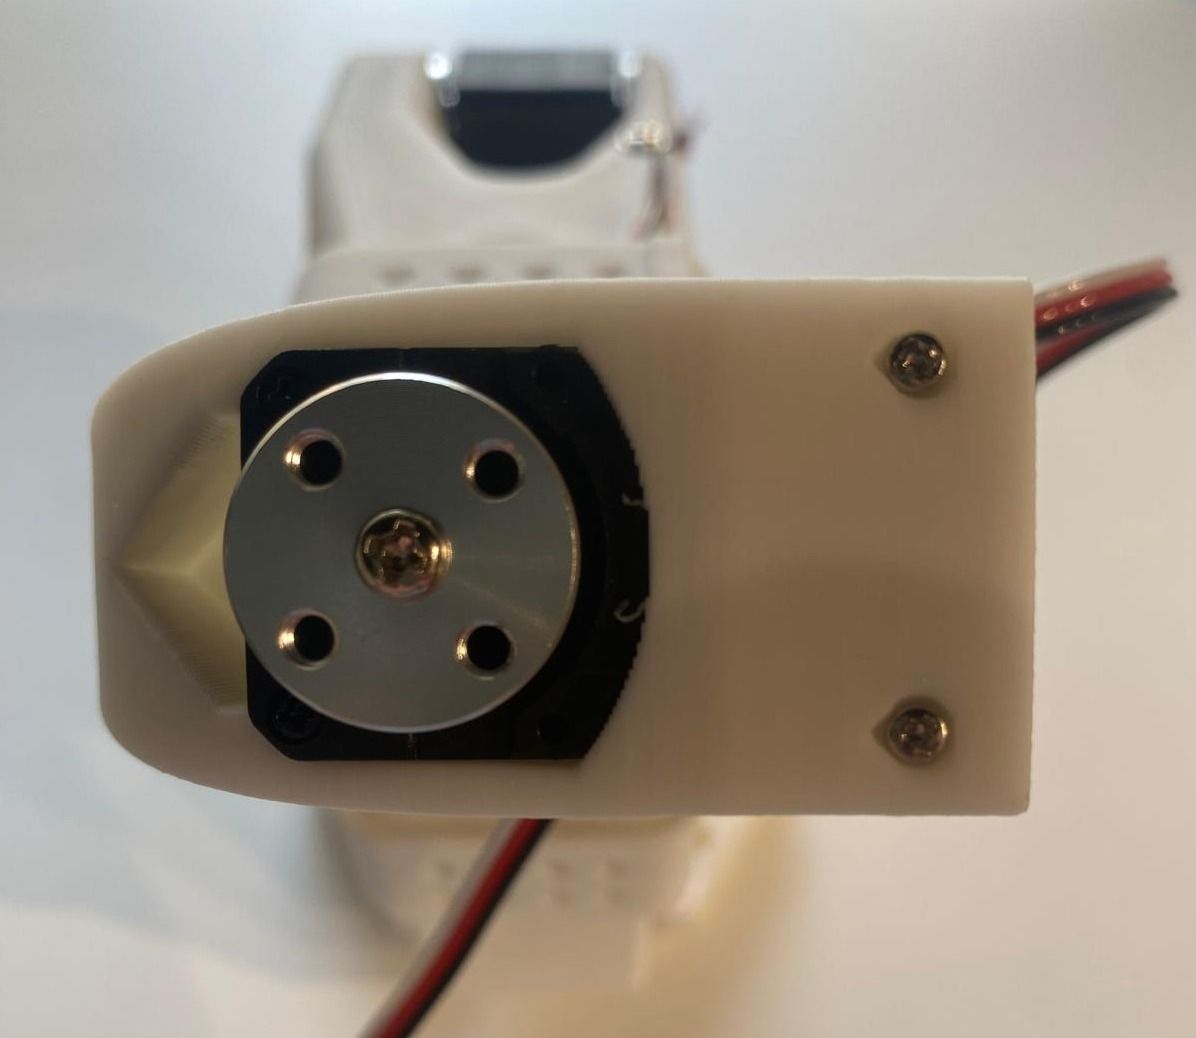
 **Step 6: Attach Motor Horns**
- Install both motor horns, securing the top horn with a screw. Try not to move the motor position when attaching the motor horn, especially for the leader arms, where we removed the gears.
**Step 6: Attach Motor Horns**
- Install both motor horns, securing the top horn with a screw. Try not to move the motor position when attaching the motor horn, especially for the leader arms, where we removed the gears.
Video adding motor horn
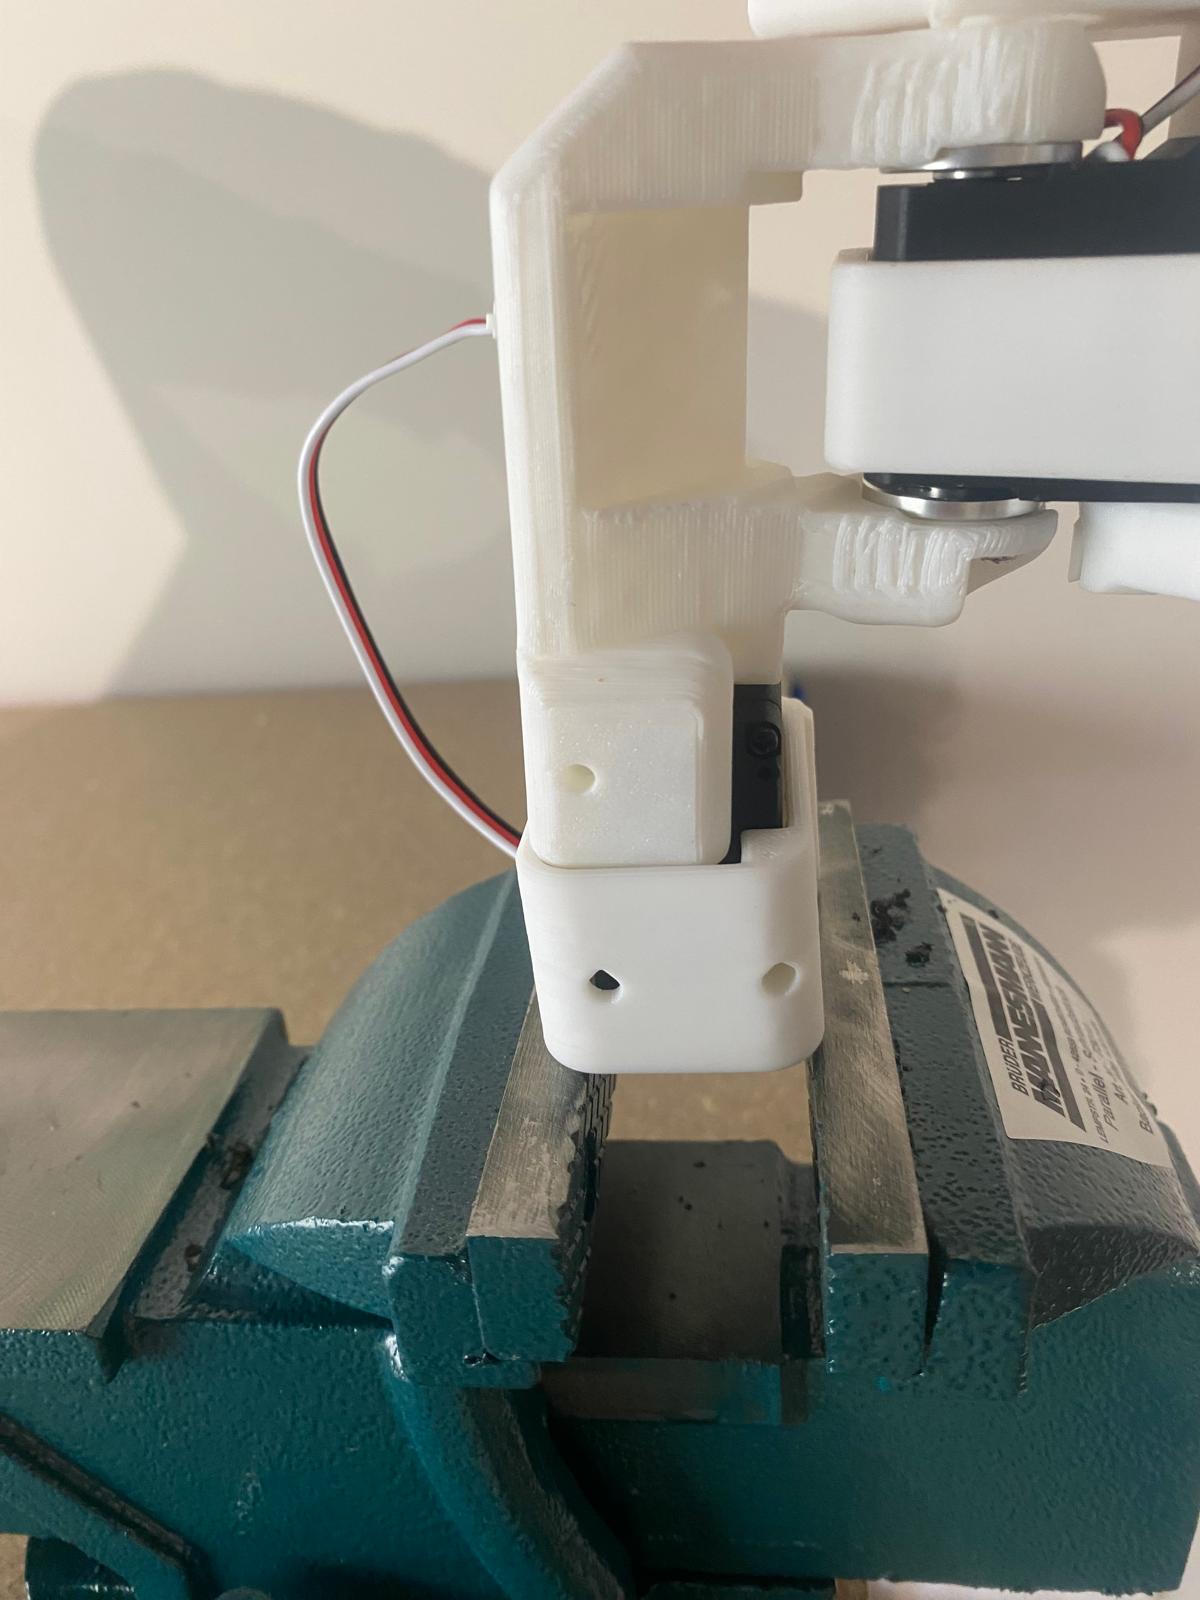
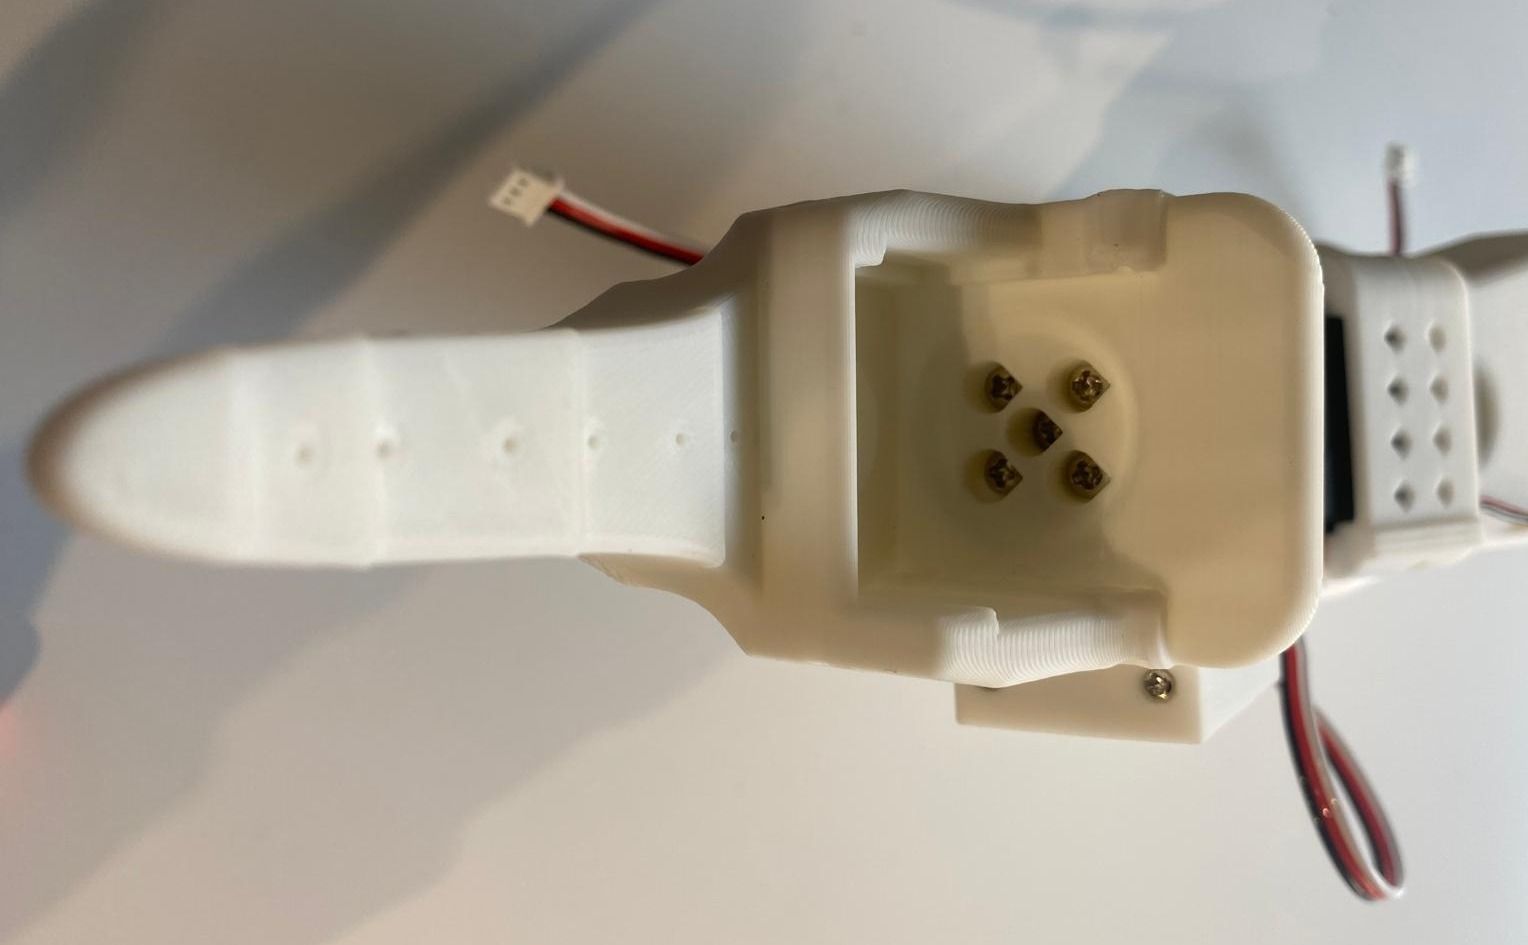
**Step 7: Attach Shoulder Part**
- Route one wire to the back of the robot and the other to the left or in photo towards you (see photo).
- Attach the shoulder part.
 **Step 8: Secure Shoulder**
- Tighten the shoulder part with 4 screws on top and 4 on the bottom
*(access bottom holes by turning the shoulder).*
---
### Second Motor Assembly
**Step 9: Install Motor 2**
- Slide the second motor in from the top and link the wire from motor 1 to motor 2.
**Step 8: Secure Shoulder**
- Tighten the shoulder part with 4 screws on top and 4 on the bottom
*(access bottom holes by turning the shoulder).*
---
### Second Motor Assembly
**Step 9: Install Motor 2**
- Slide the second motor in from the top and link the wire from motor 1 to motor 2.
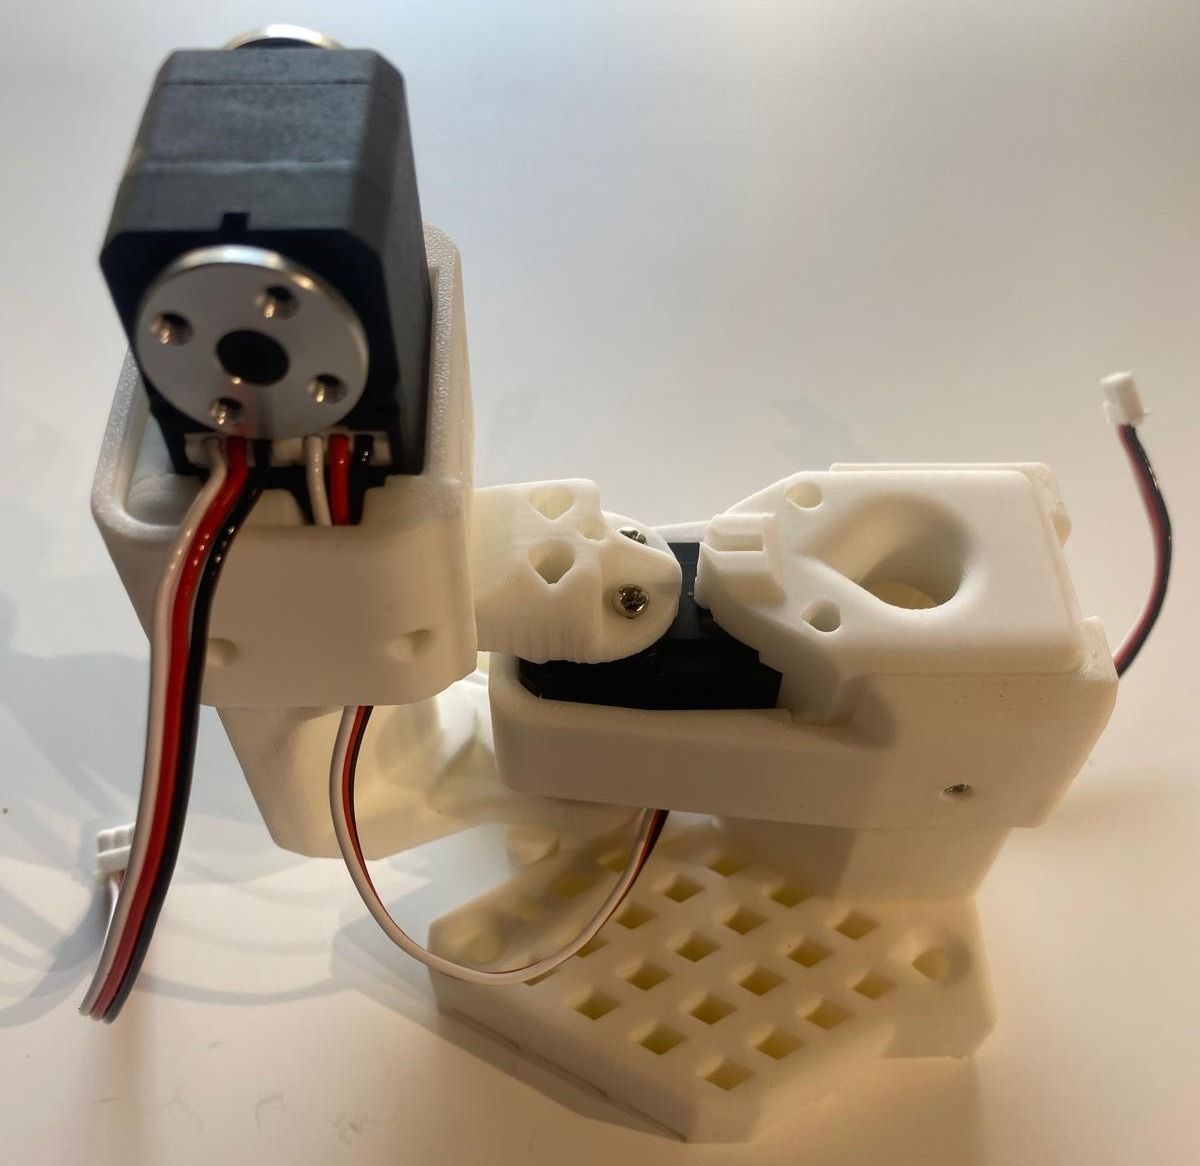
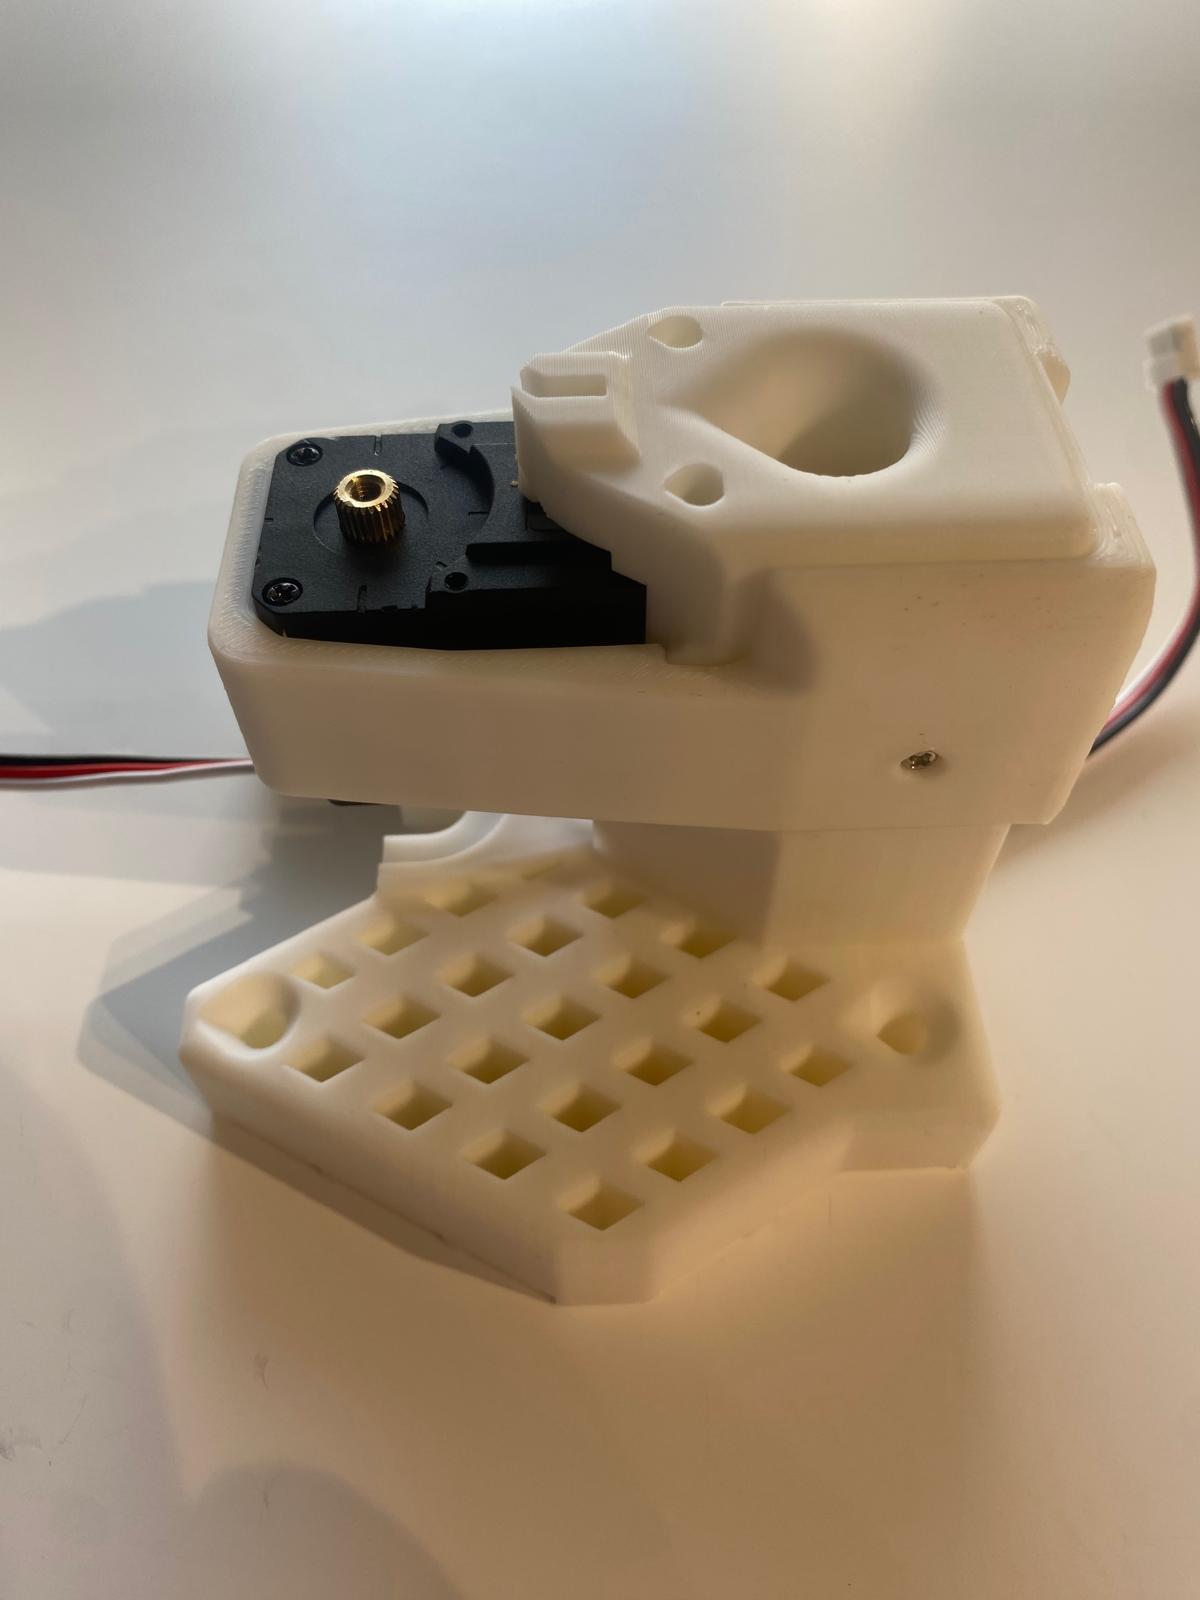
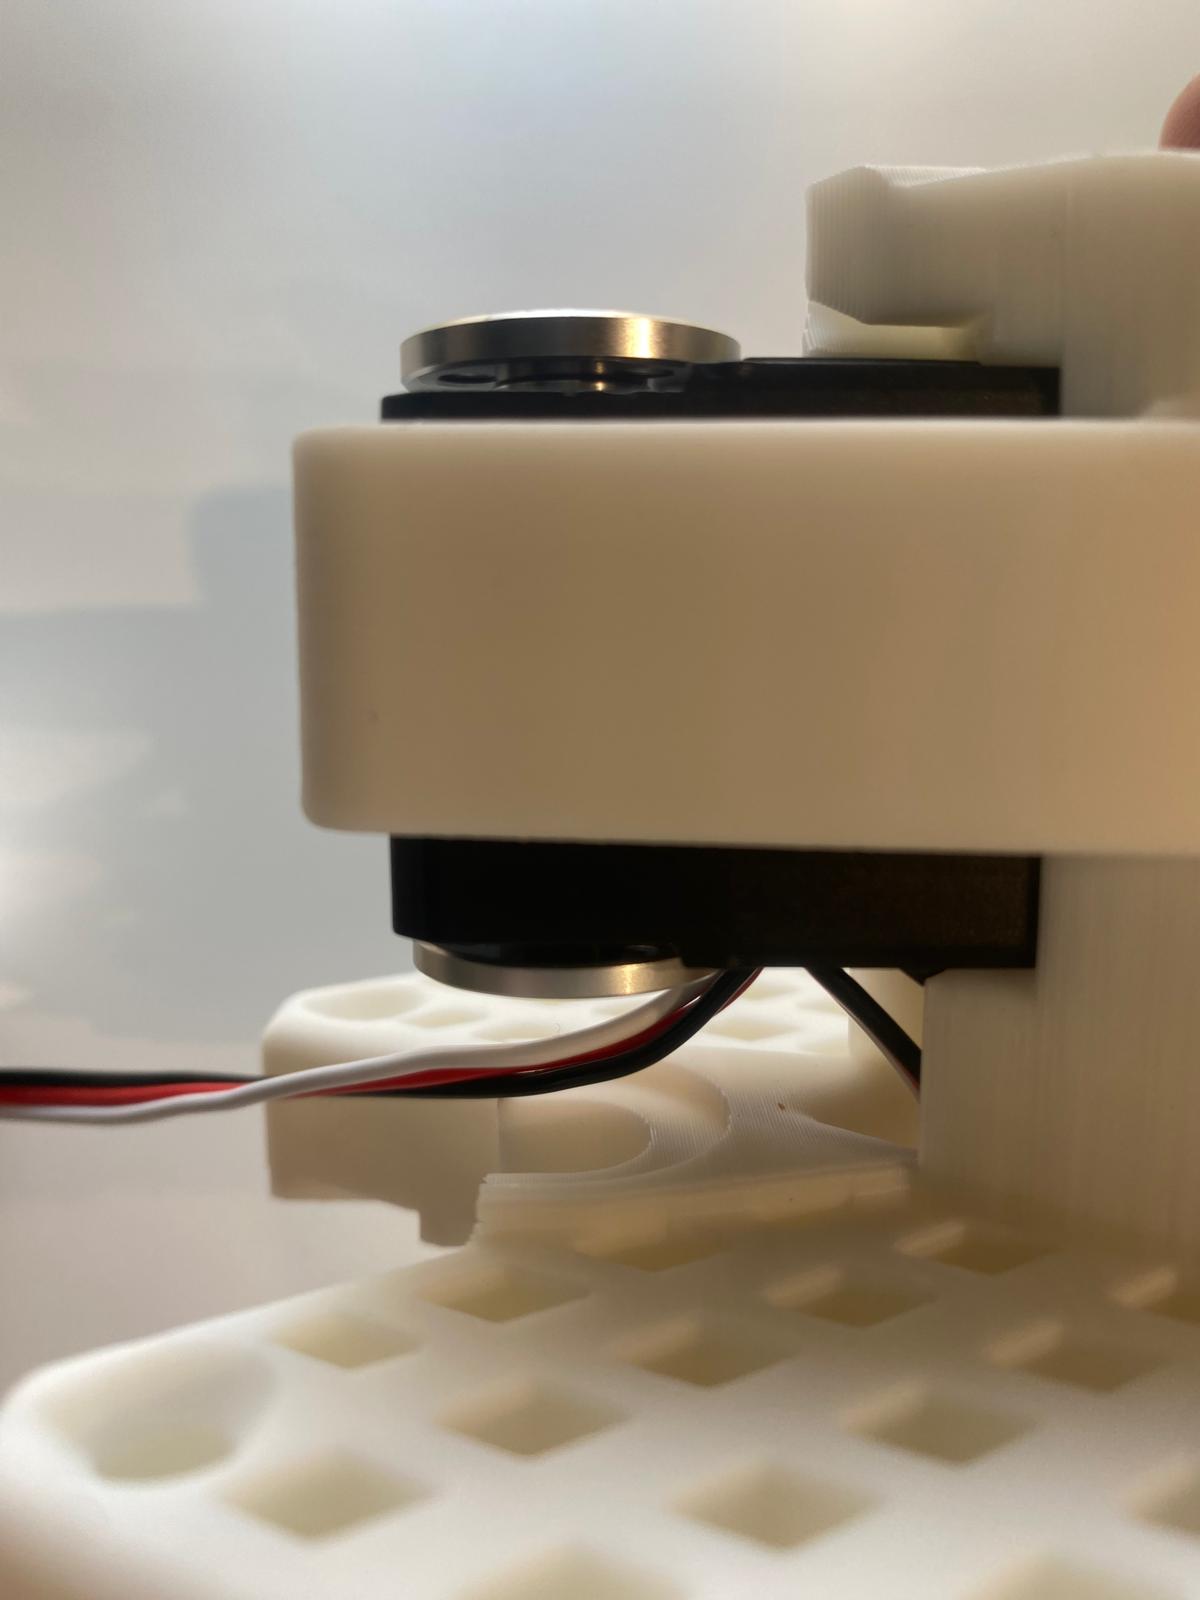
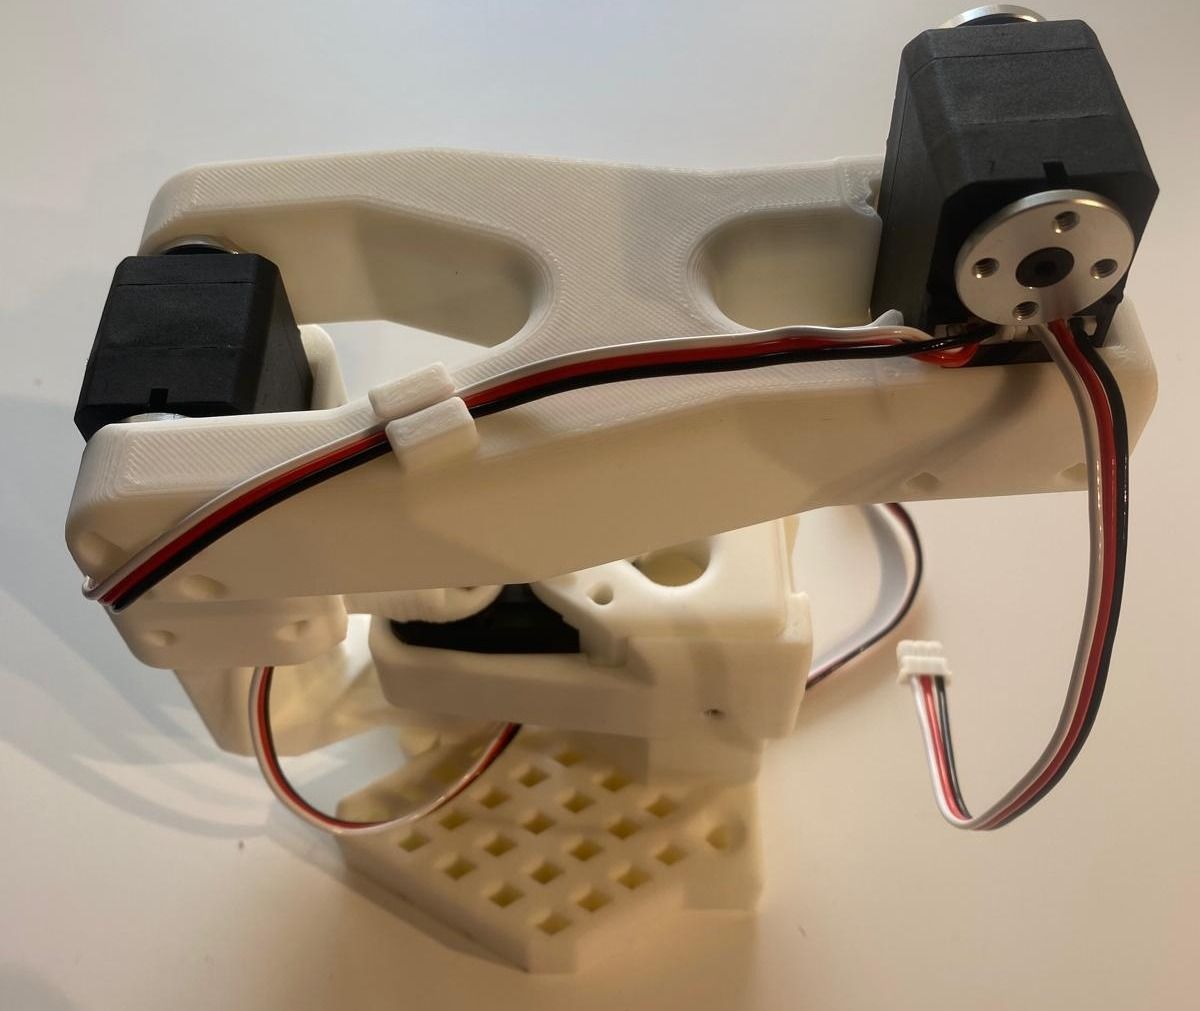
 **Step 10: Attach Shoulder Holder**
- Add the shoulder motor holder.
- Ensure the wire from motor 1 to motor 2 goes behind the holder while the other wire is routed upward (see photo).
- This part can be tight to assemble, you can use a workbench like the image or a similar setup to push the part around the motor.
**Step 11: Secure Motor 2**
- Fasten the second motor with 4 screws.
**Step 12: Attach Motor Horn**
- Attach both motor horns to motor 2, again use the horn screw.
**Step 13: Attach Base**
- Install the base attachment using 2 screws.
**Step 10: Attach Shoulder Holder**
- Add the shoulder motor holder.
- Ensure the wire from motor 1 to motor 2 goes behind the holder while the other wire is routed upward (see photo).
- This part can be tight to assemble, you can use a workbench like the image or a similar setup to push the part around the motor.
**Step 11: Secure Motor 2**
- Fasten the second motor with 4 screws.
**Step 12: Attach Motor Horn**
- Attach both motor horns to motor 2, again use the horn screw.
**Step 13: Attach Base**
- Install the base attachment using 2 screws.
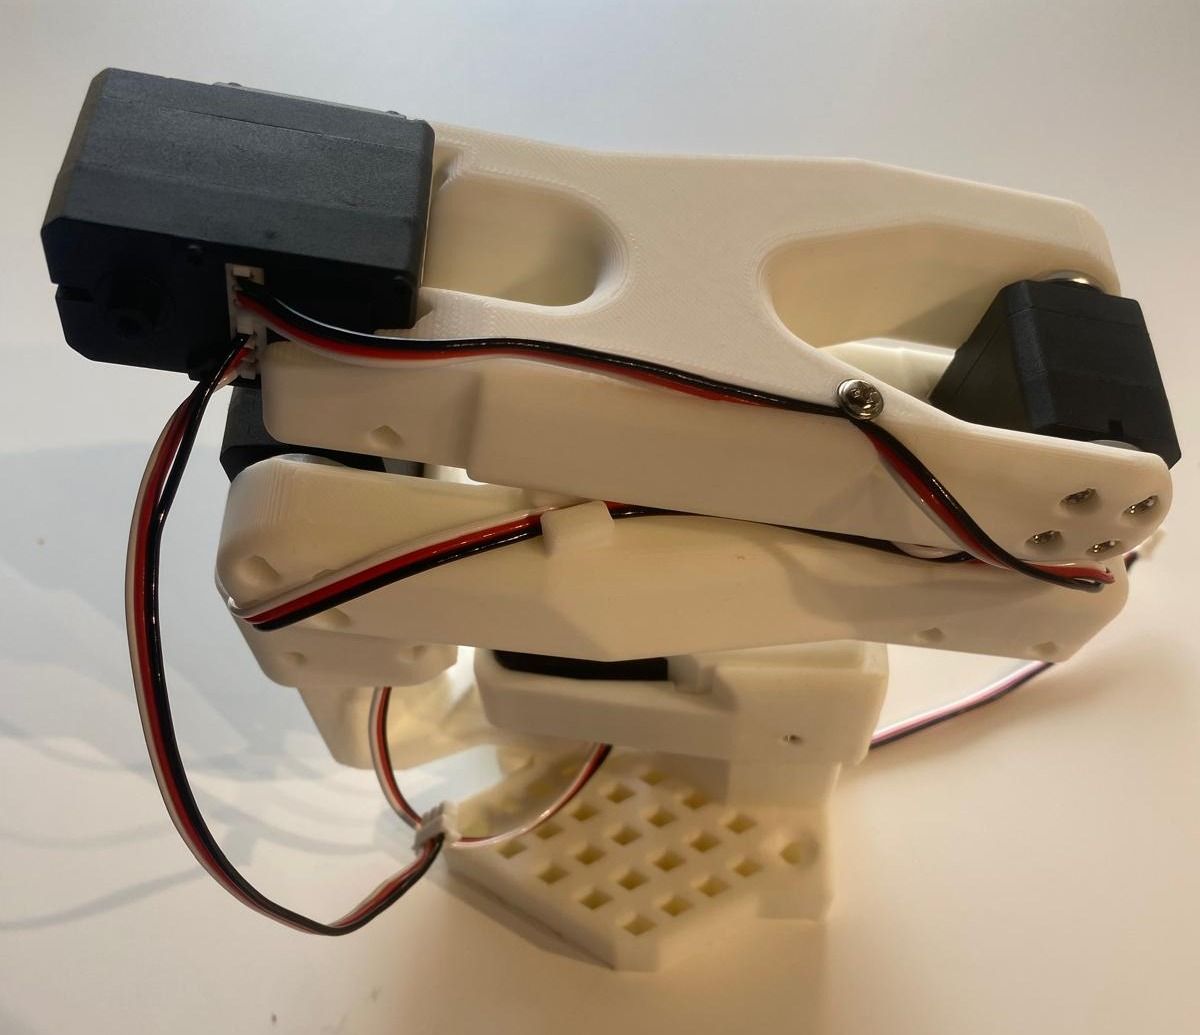
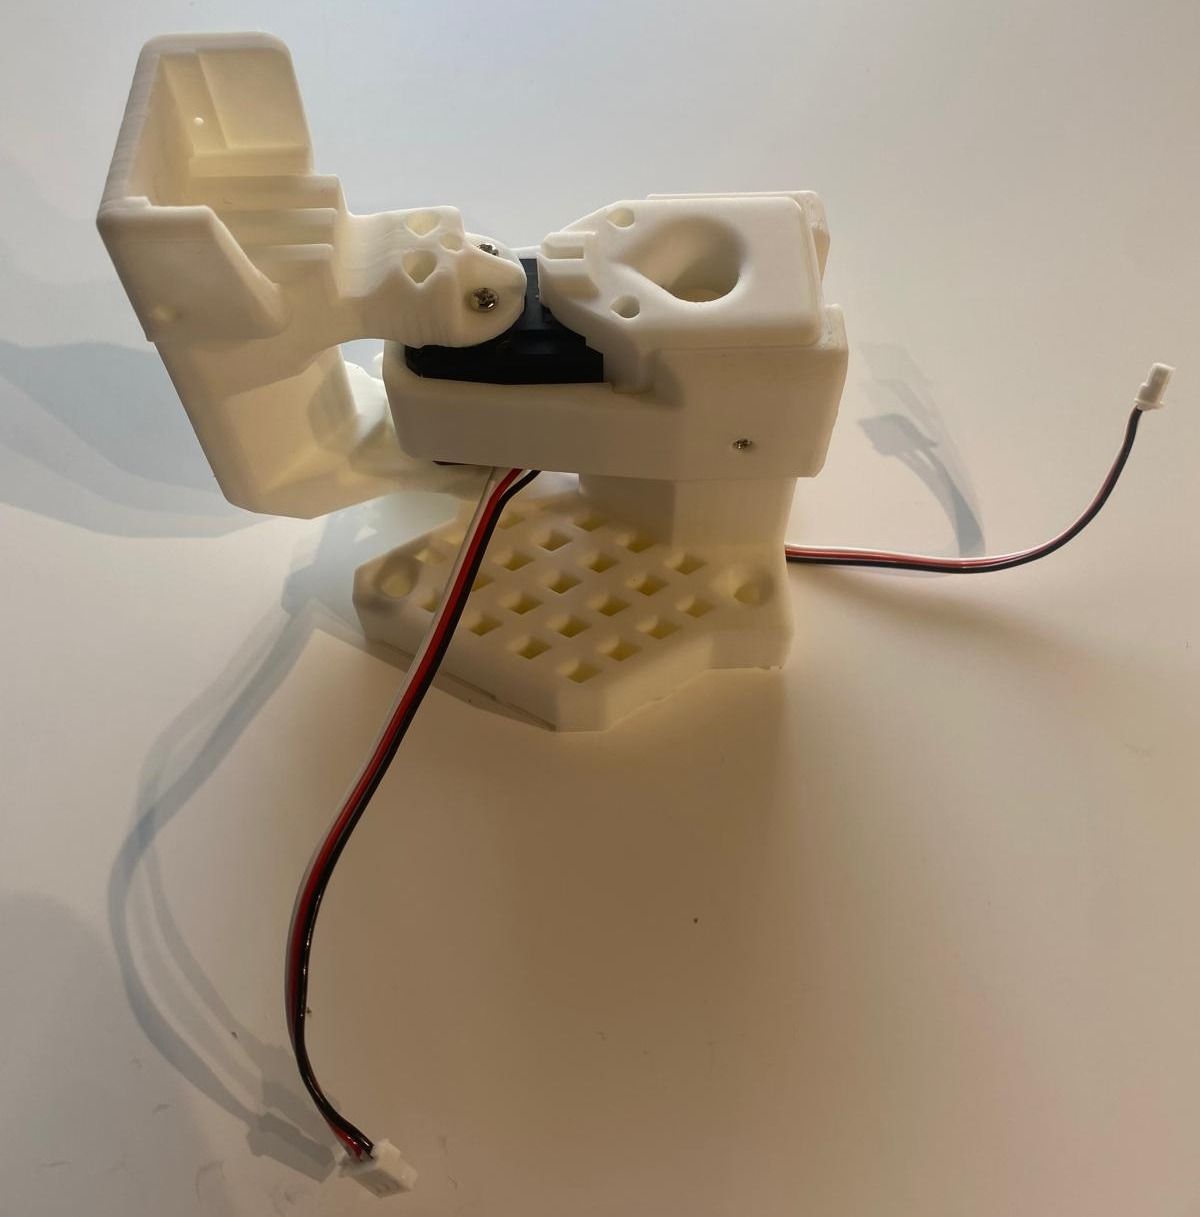
 **Step 14: Attach Upper Arm**
- Attach the upper arm with 4 screws on each side.
**Step 14: Attach Upper Arm**
- Attach the upper arm with 4 screws on each side.
 ---
### Third Motor Assembly
**Step 15: Install Motor 3**
- Route the motor cable from motor 2 through the cable holder to motor 3, then secure motor 3 with 4 screws.
**Step 16: Attach Motor Horn**
- Attach both motor horns to motor 3 and secure one again with a horn screw.
---
### Third Motor Assembly
**Step 15: Install Motor 3**
- Route the motor cable from motor 2 through the cable holder to motor 3, then secure motor 3 with 4 screws.
**Step 16: Attach Motor Horn**
- Attach both motor horns to motor 3 and secure one again with a horn screw.
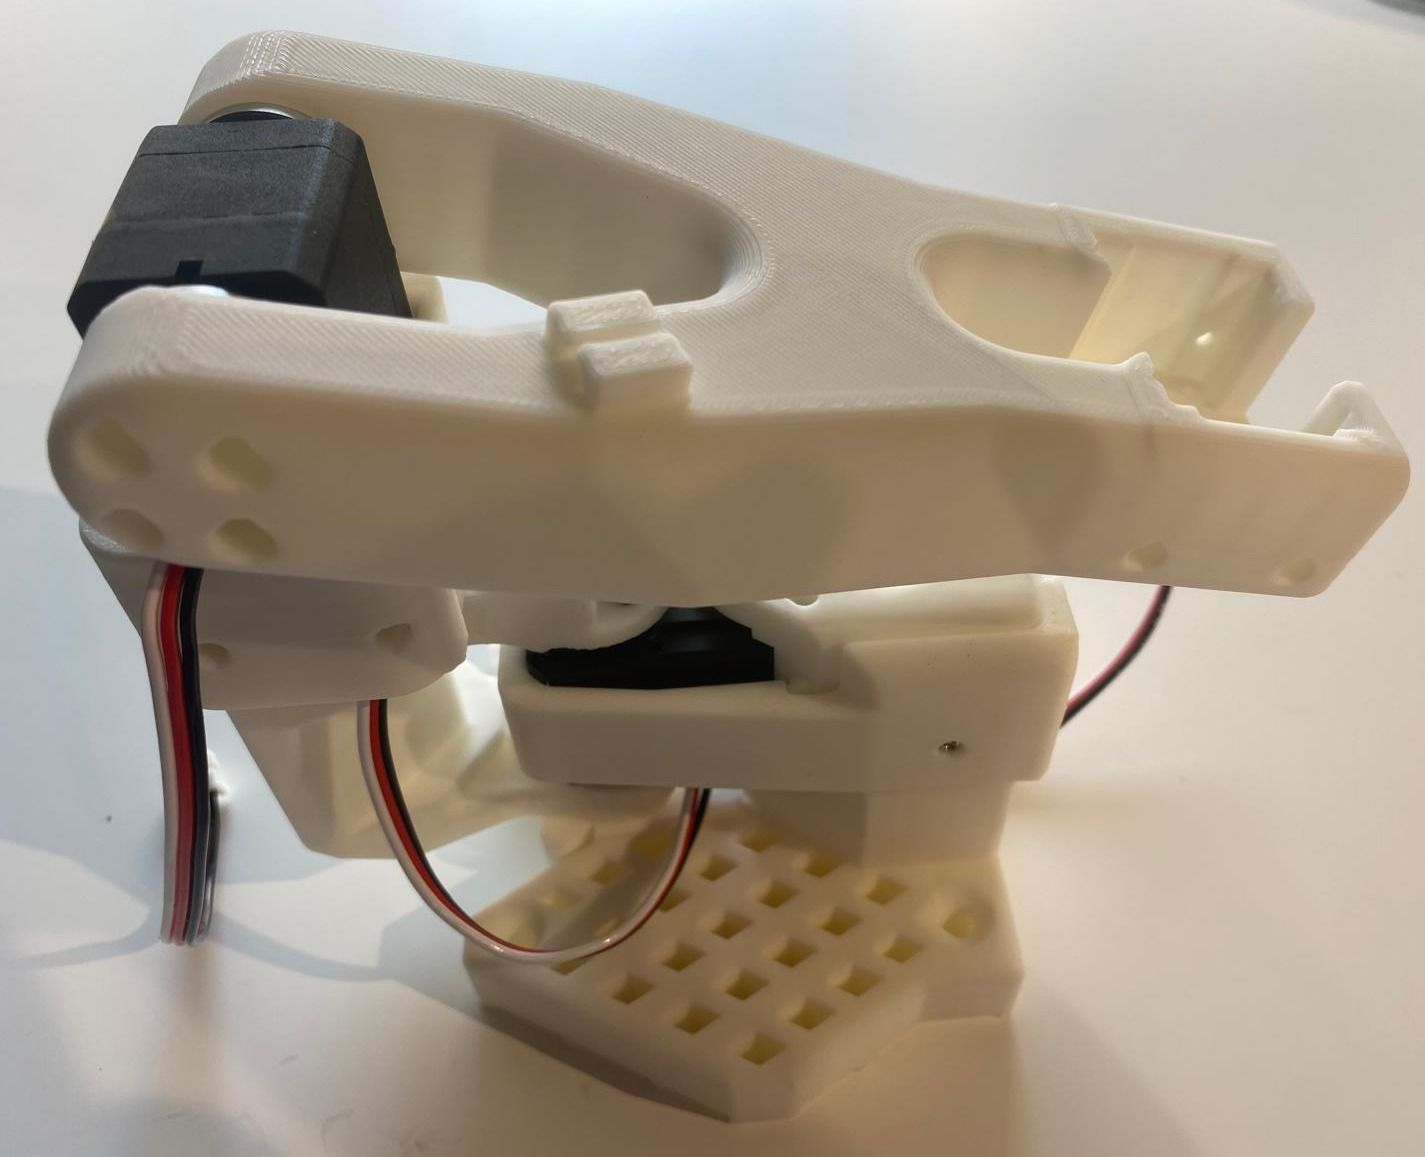
 **Step 17: Attach Forearm**
- Connect the forearm to motor 3 using 4 screws on each side.
**Step 17: Attach Forearm**
- Connect the forearm to motor 3 using 4 screws on each side.
 ---
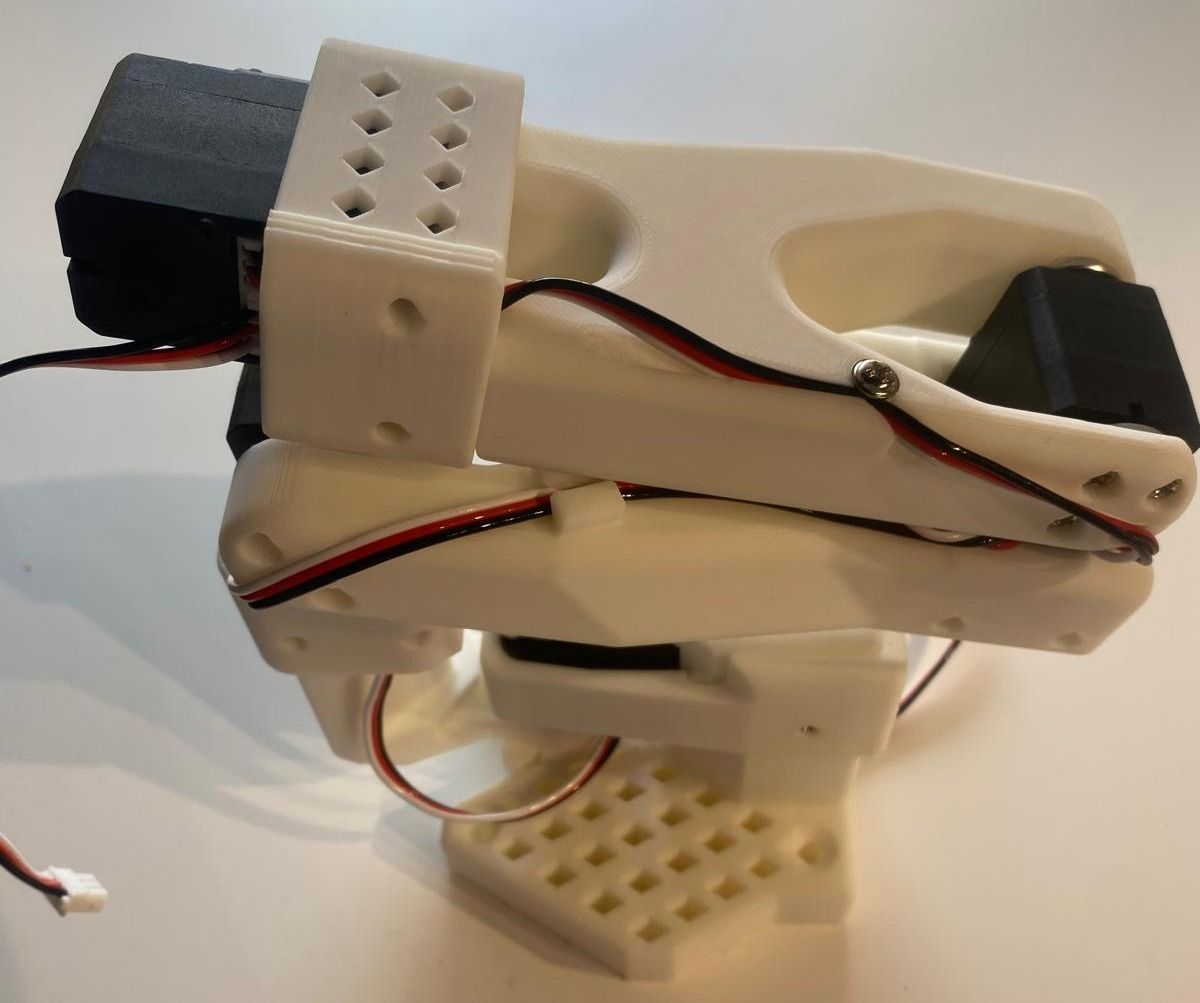
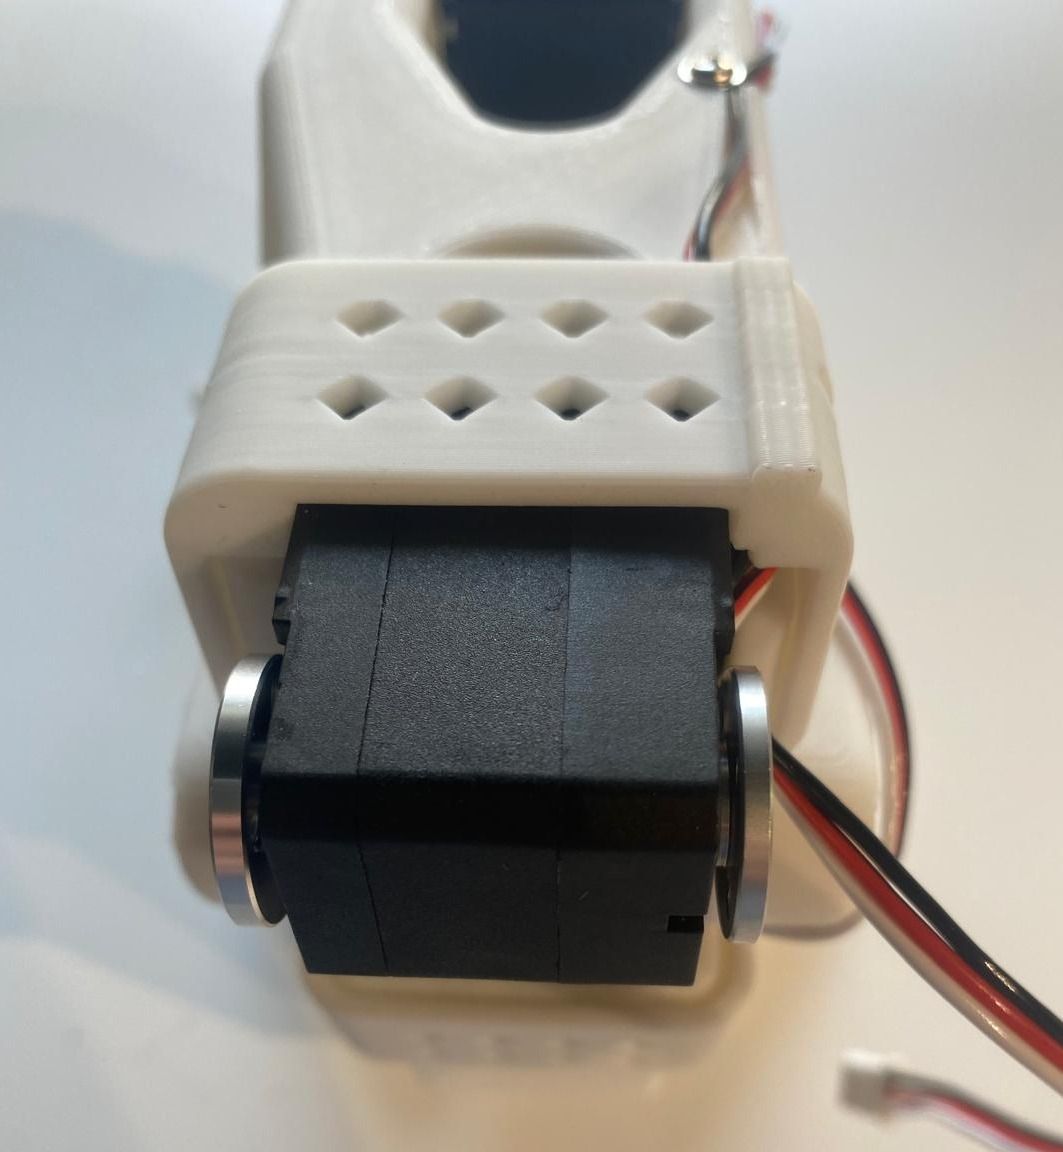
### Fourth Motor Assembly
**Step 18: Install Motor 4**
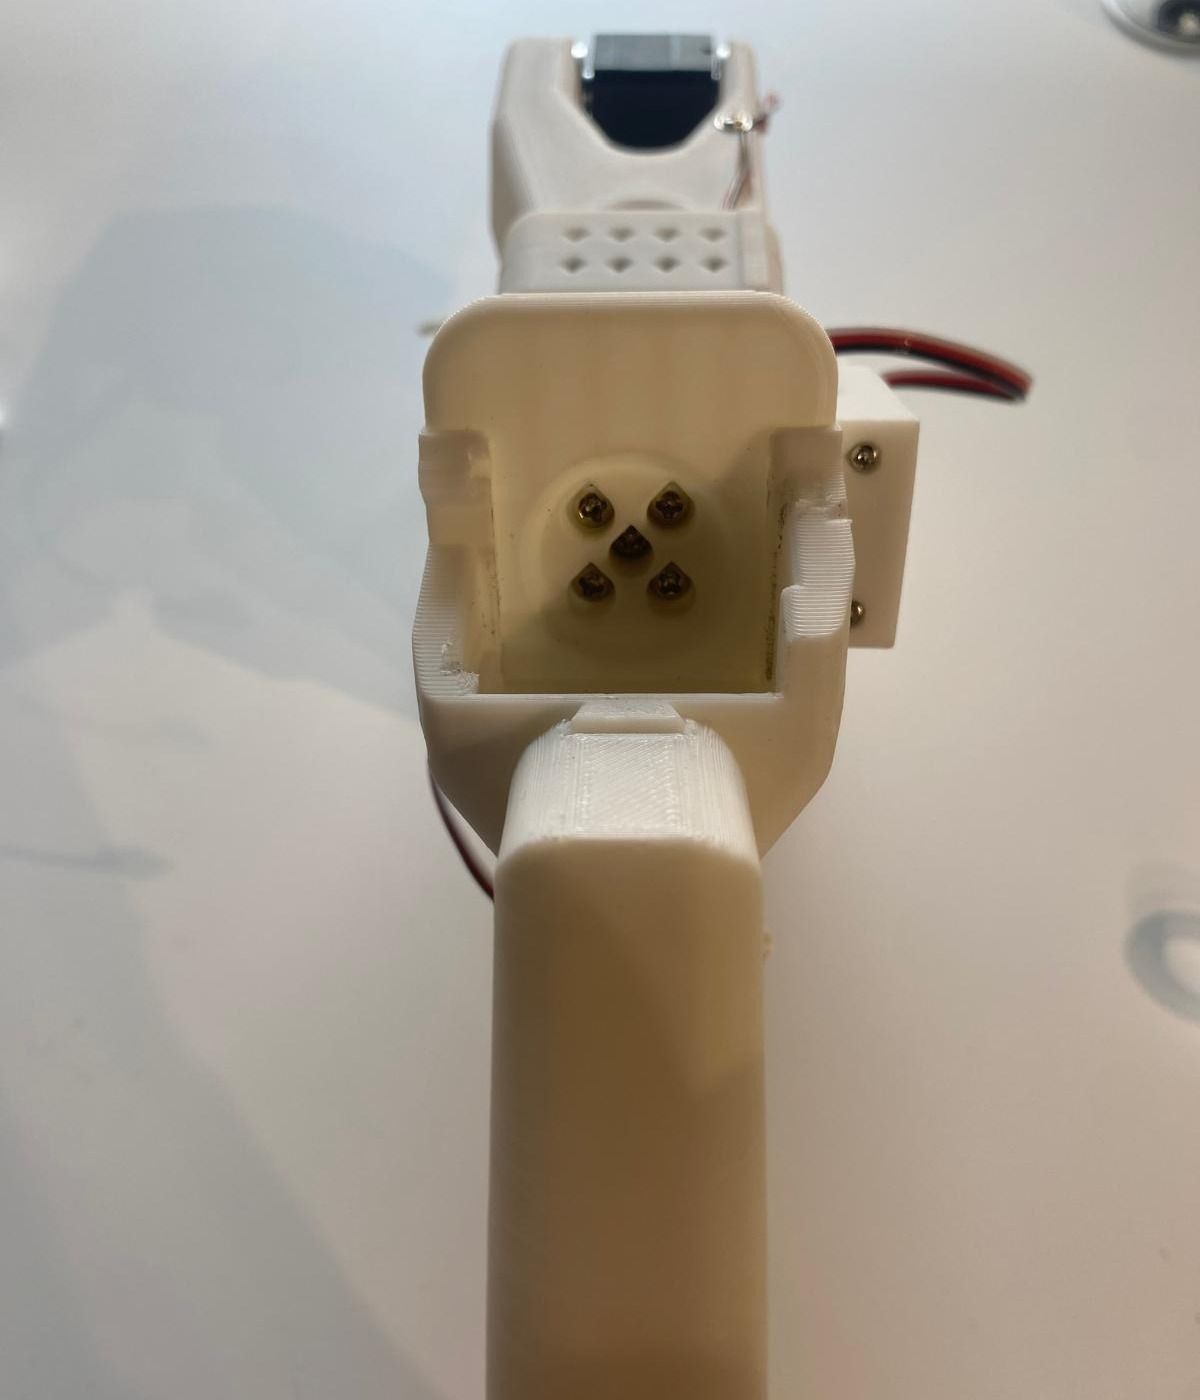
- Slide in motor 4, attach the cable from motor 3, and secure the cable in its holder with a screw.
**Step 19: Attach Motor Holder 4**
- Install the fourth motor holder (a tight fit). Ensure one wire is routed upward and the wire from motor 3 is routed downward (see photo).
---
### Fourth Motor Assembly
**Step 18: Install Motor 4**
- Slide in motor 4, attach the cable from motor 3, and secure the cable in its holder with a screw.
**Step 19: Attach Motor Holder 4**
- Install the fourth motor holder (a tight fit). Ensure one wire is routed upward and the wire from motor 3 is routed downward (see photo).
 **Step 20: Secure Motor 4 & Attach Horn**
- Fasten motor 4 with 4 screws and attach its motor horns, use for one a horn screw.
**Step 20: Secure Motor 4 & Attach Horn**
- Fasten motor 4 with 4 screws and attach its motor horns, use for one a horn screw.
 ---
### Wrist Assembly
**Step 21: Install Motor 5**
- Insert motor 5 into the wrist holder and secure it with 2 front screws.
---
### Wrist Assembly
**Step 21: Install Motor 5**
- Insert motor 5 into the wrist holder and secure it with 2 front screws.
 **Step 22: Attach Wrist**
- Connect the wire from motor 4 to motor 5. And already insert the other wire for the gripper.
- Secure the wrist to motor 4 using 4 screws on both sides.
**Step 22: Attach Wrist**
- Connect the wire from motor 4 to motor 5. And already insert the other wire for the gripper.
- Secure the wrist to motor 4 using 4 screws on both sides.
 **Step 23: Attach Wrist Horn**
- Install only one motor horn on the wrist motor and secure it with a horn screw.
**Step 23: Attach Wrist Horn**
- Install only one motor horn on the wrist motor and secure it with a horn screw.
 ---
### Follower Configuration
**Step 24: Attach Gripper**
- Attach the gripper to motor 5.
---
### Follower Configuration
**Step 24: Attach Gripper**
- Attach the gripper to motor 5.
 **Step 25: Install Gripper Motor**
- Insert the gripper motor, connect the motor wire from motor 5 to motor 6, and secure it with 3 screws on each side.
**Step 25: Install Gripper Motor**
- Insert the gripper motor, connect the motor wire from motor 5 to motor 6, and secure it with 3 screws on each side.
 **Step 26: Attach Gripper Horn & Claw**
- Attach the motor horns and again use a horn screw.
- Install the gripper claw and secure it with 4 screws on both sides.
**Step 26: Attach Gripper Horn & Claw**
- Attach the motor horns and again use a horn screw.
- Install the gripper claw and secure it with 4 screws on both sides.
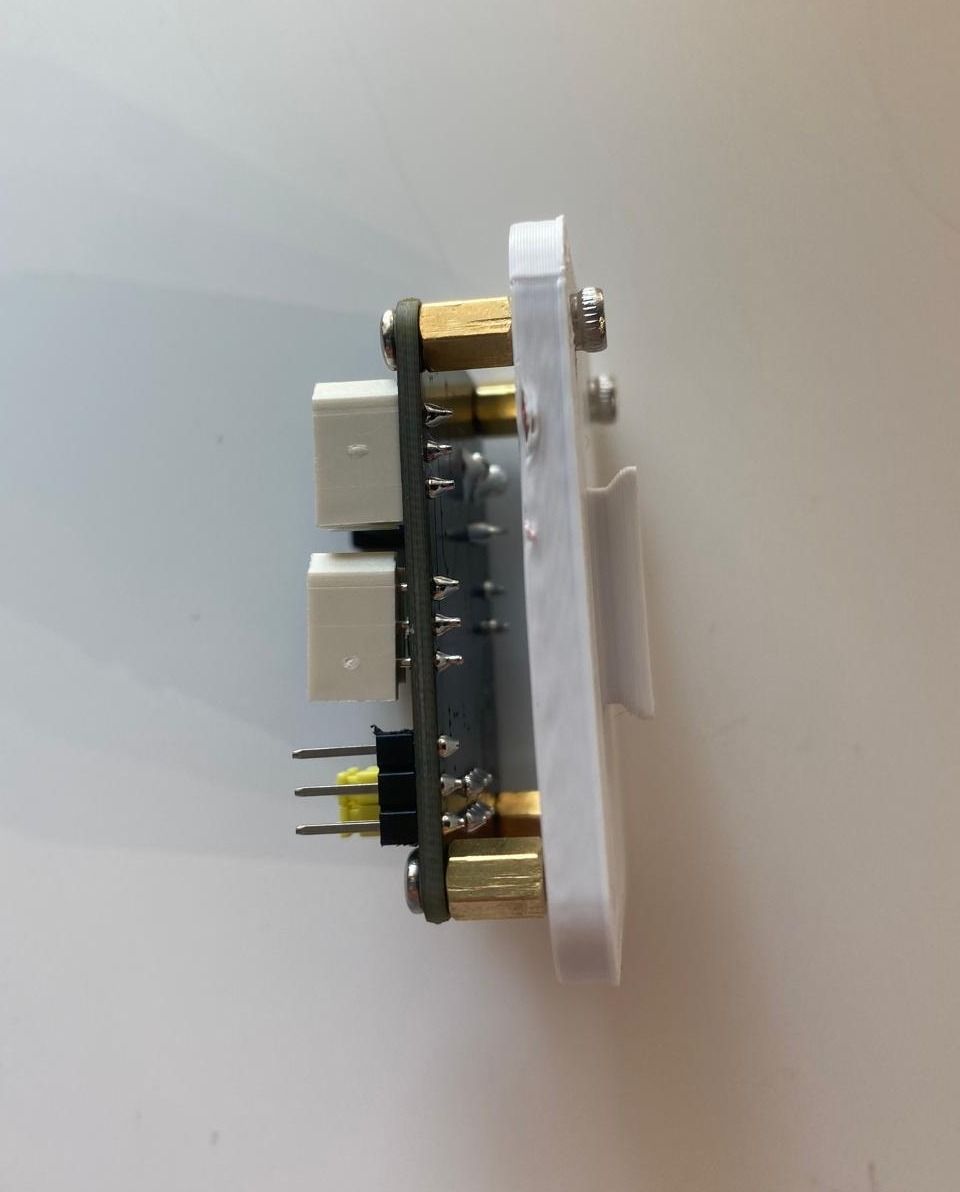
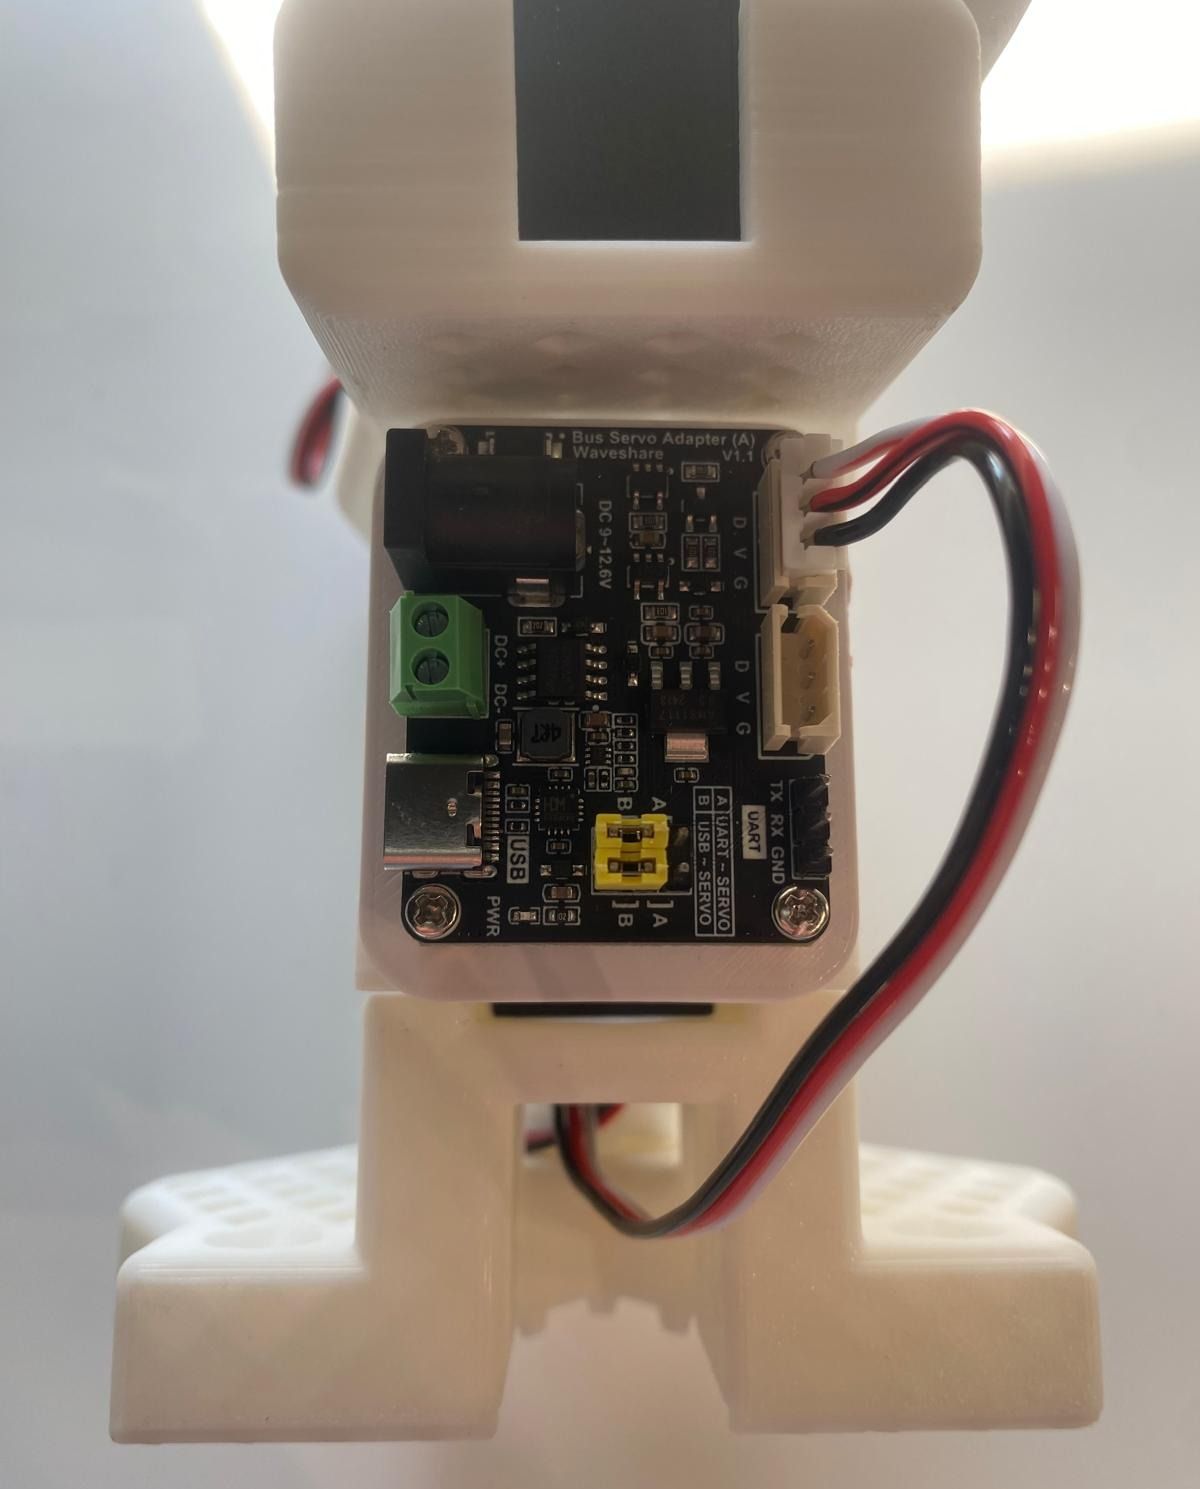
 **Step 27: Mount Controller**
- Attach the motor controller on the back.
*Assembly complete – proceed to Leader arm assembly.*
---
### Leader Configuration
For the leader configuration, perform **Steps 1–23**. Make sure that you removed the motor gears from the motors.
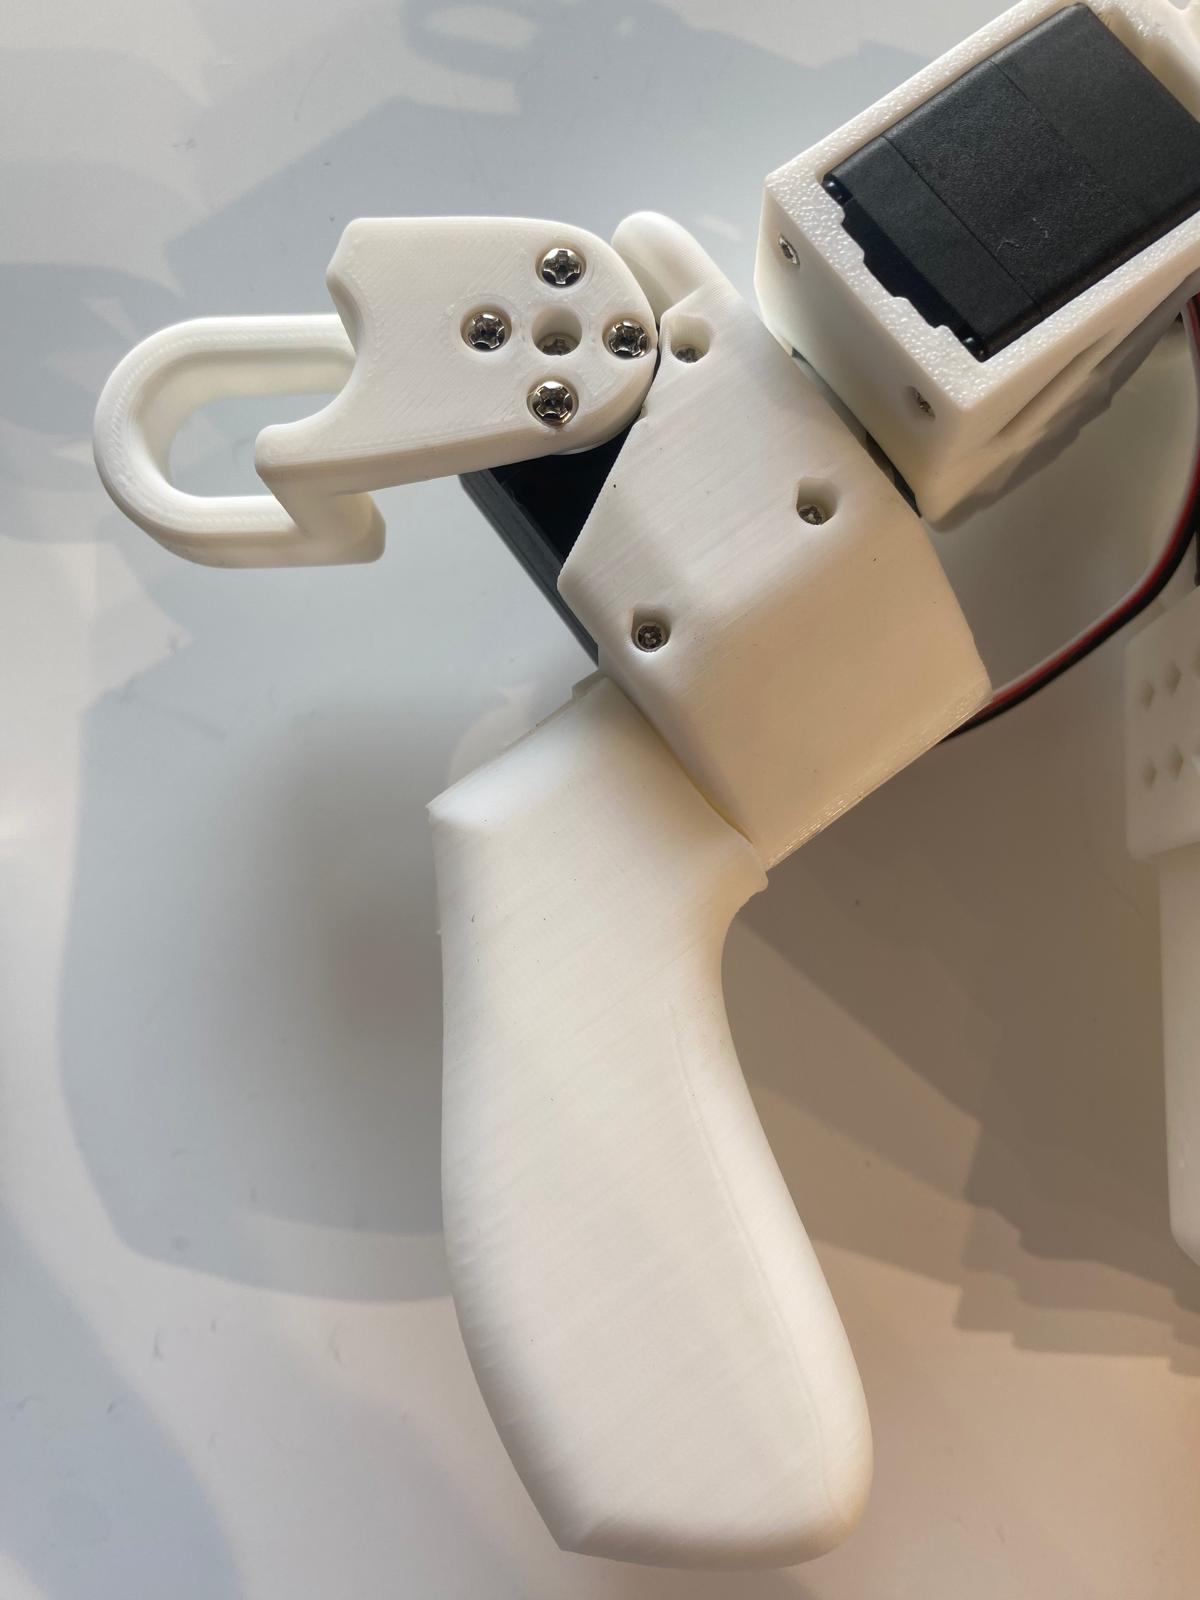
**Step 24: Attach Leader Holder**
- Mount the leader holder onto the wrist and secure it with a screw.
**Step 27: Mount Controller**
- Attach the motor controller on the back.
*Assembly complete – proceed to Leader arm assembly.*
---
### Leader Configuration
For the leader configuration, perform **Steps 1–23**. Make sure that you removed the motor gears from the motors.
**Step 24: Attach Leader Holder**
- Mount the leader holder onto the wrist and secure it with a screw.
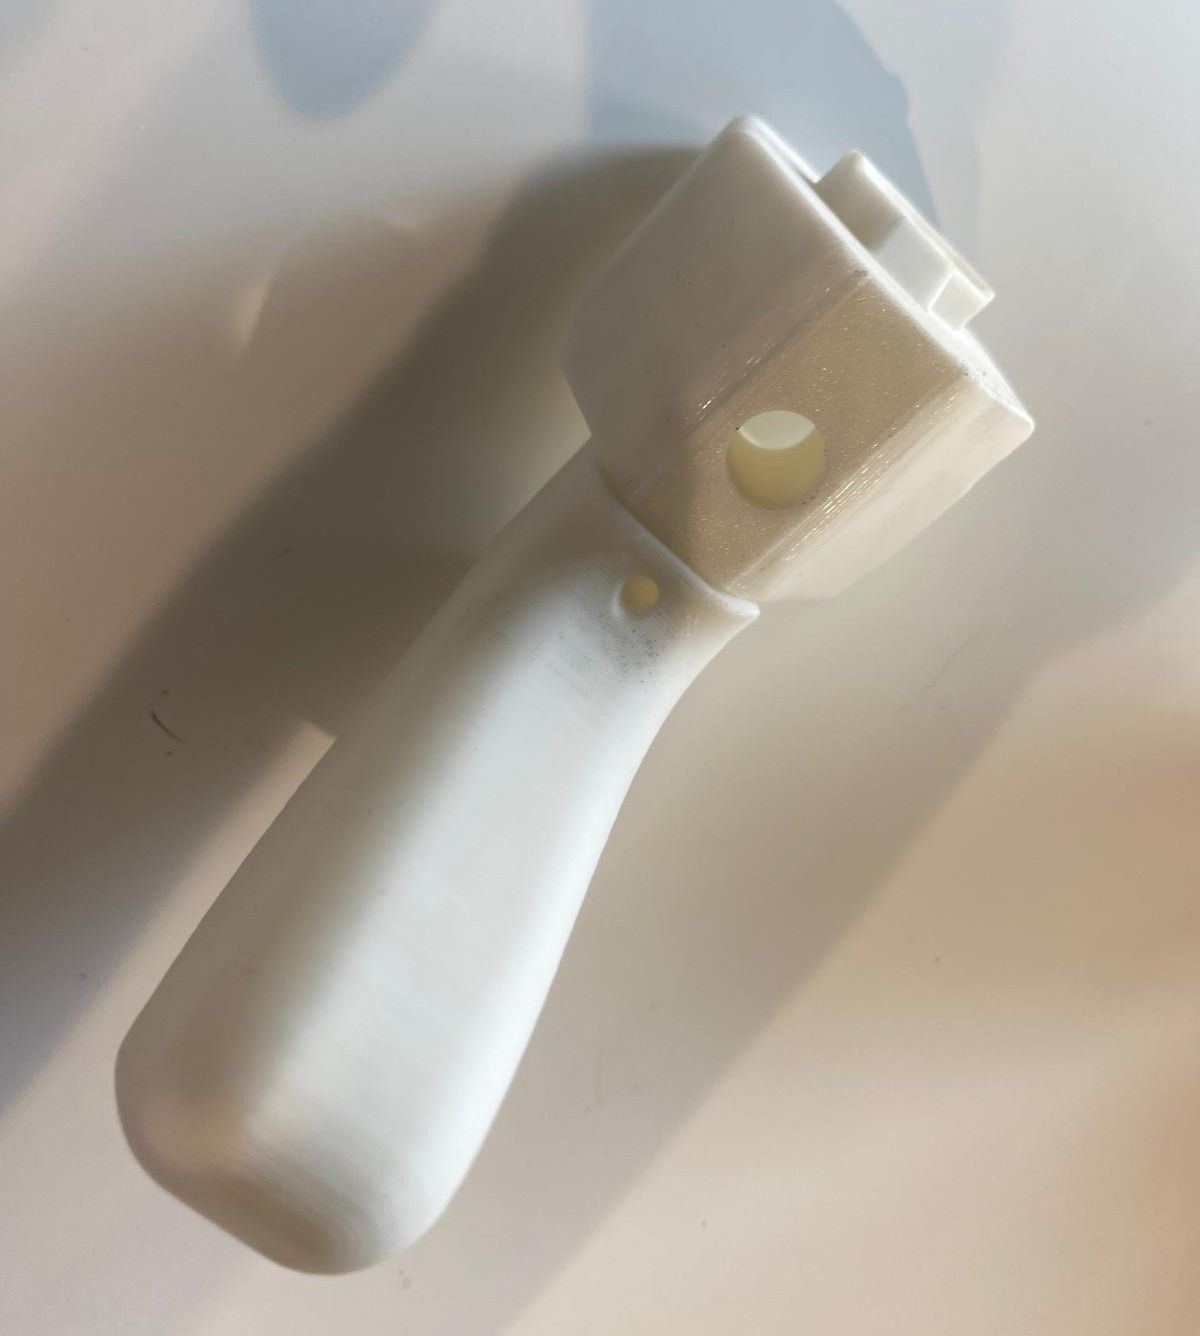 **Step 25: Attach Handle**
- Attach the handle to motor 5 using 4 screws.
**Step 25: Attach Handle**
- Attach the handle to motor 5 using 4 screws.
 **Step 26: Install Gripper Motor**
- Insert the gripper motor, secure it with 3 screws on each side, attach a motor horn using a horn screw, and connect the motor wire.
**Step 26: Install Gripper Motor**
- Insert the gripper motor, secure it with 3 screws on each side, attach a motor horn using a horn screw, and connect the motor wire.
 **Step 27: Attach Trigger**
- Attach the follower trigger with 4 screws.
**Step 27: Attach Trigger**
- Attach the follower trigger with 4 screws.
 **Step 28: Mount Controller**
- Attach the motor controller on the back.
*Assembly complete – proceed to calibration.*
## E. Calibrate
Next, you'll need to calibrate your SO-100 robot to ensure that the leader and follower arms have the same position values when they are in the same physical position. This calibration is essential because it allows a neural network trained on one SO-100 robot to work on another.
#### a. Manual calibration of follower arm
> [!IMPORTANT]
> Contrarily to step 6 of the [assembly video](https://youtu.be/FioA2oeFZ5I?t=724) which illustrates the auto calibration, we will actually do manual calibration of follower for now.
You will need to move the follower arm to these positions sequentially:
| 1. Zero position | 2. Rotated position | 3. Rest position |
| ------------------------------------------------------------------------------------------------------------------------------------------------------------ | --------------------------------------------------------------------------------------------------------------------------------------------------------------------- | ------------------------------------------------------------------------------------------------------------------------------------------------------------ |
|
**Step 28: Mount Controller**
- Attach the motor controller on the back.
*Assembly complete – proceed to calibration.*
## E. Calibrate
Next, you'll need to calibrate your SO-100 robot to ensure that the leader and follower arms have the same position values when they are in the same physical position. This calibration is essential because it allows a neural network trained on one SO-100 robot to work on another.
#### a. Manual calibration of follower arm
> [!IMPORTANT]
> Contrarily to step 6 of the [assembly video](https://youtu.be/FioA2oeFZ5I?t=724) which illustrates the auto calibration, we will actually do manual calibration of follower for now.
You will need to move the follower arm to these positions sequentially:
| 1. Zero position | 2. Rotated position | 3. Rest position |
| ------------------------------------------------------------------------------------------------------------------------------------------------------------ | --------------------------------------------------------------------------------------------------------------------------------------------------------------------- | ------------------------------------------------------------------------------------------------------------------------------------------------------------ |
|  |
|  |
|  |
Make sure both arms are connected and run this script to launch manual calibration:
```bash
python lerobot/scripts/control_robot.py \
--robot.type=so100 \
--robot.cameras='{}' \
--control.type=calibrate \
--control.arms='["main_follower"]'
```
#### b. Manual calibration of leader arm
Follow step 6 of the [assembly video](https://youtu.be/FioA2oeFZ5I?t=724) which illustrates the manual calibration. You will need to move the leader arm to these positions sequentially:
| 1. Zero position | 2. Rotated position | 3. Rest position |
| ------------------------------------------------------------------------------------------------------------------------------------------------------ | --------------------------------------------------------------------------------------------------------------------------------------------------------------- | ------------------------------------------------------------------------------------------------------------------------------------------------------ |
|
|
Make sure both arms are connected and run this script to launch manual calibration:
```bash
python lerobot/scripts/control_robot.py \
--robot.type=so100 \
--robot.cameras='{}' \
--control.type=calibrate \
--control.arms='["main_follower"]'
```
#### b. Manual calibration of leader arm
Follow step 6 of the [assembly video](https://youtu.be/FioA2oeFZ5I?t=724) which illustrates the manual calibration. You will need to move the leader arm to these positions sequentially:
| 1. Zero position | 2. Rotated position | 3. Rest position |
| ------------------------------------------------------------------------------------------------------------------------------------------------------ | --------------------------------------------------------------------------------------------------------------------------------------------------------------- | ------------------------------------------------------------------------------------------------------------------------------------------------------ |
|  |
|  |
|  |
Run this script to launch manual calibration:
```bash
python lerobot/scripts/control_robot.py \
--robot.type=so100 \
--robot.cameras='{}' \
--control.type=calibrate \
--control.arms='["main_leader"]'
```
## F. Teleoperate
**Simple teleop**
Then you are ready to teleoperate your robot! Run this simple script (it won't connect and display the cameras):
```bash
python lerobot/scripts/control_robot.py \
--robot.type=so100 \
--robot.cameras='{}' \
--control.type=teleoperate
```
#### a. Teleop with displaying cameras
Follow [this guide to setup your cameras](https://github.com/huggingface/lerobot/blob/main/examples/7_get_started_with_real_robot.md#c-add-your-cameras-with-opencvcamera). Then you will be able to display the cameras on your computer while you are teleoperating by running the following code. This is useful to prepare your setup before recording your first dataset.
```bash
python lerobot/scripts/control_robot.py \
--robot.type=so100 \
--control.type=teleoperate
```
## G. Record a dataset
Once you're familiar with teleoperation, you can record your first dataset with SO-100.
If you want to use the Hugging Face hub features for uploading your dataset and you haven't previously done it, make sure you've logged in using a write-access token, which can be generated from the [Hugging Face settings](https://huggingface.co/settings/tokens):
```bash
huggingface-cli login --token ${HUGGINGFACE_TOKEN} --add-to-git-credential
```
Store your Hugging Face repository name in a variable to run these commands:
```bash
HF_USER=$(huggingface-cli whoami | head -n 1)
echo $HF_USER
```
Record 2 episodes and upload your dataset to the hub:
```bash
python lerobot/scripts/control_robot.py \
--robot.type=so100 \
--control.type=record \
--control.fps=30 \
--control.single_task="Grasp a lego block and put it in the bin." \
--control.repo_id=${HF_USER}/so100_test \
--control.tags='["so100","tutorial"]' \
--control.warmup_time_s=5 \
--control.episode_time_s=30 \
--control.reset_time_s=30 \
--control.num_episodes=2 \
--control.push_to_hub=true
```
Note: You can resume recording by adding `--control.resume=true`.
## H. Visualize a dataset
If you uploaded your dataset to the hub with `--control.push_to_hub=true`, you can [visualize your dataset online](https://huggingface.co/spaces/lerobot/visualize_dataset) by copy pasting your repo id given by:
```bash
echo ${HF_USER}/so100_test
```
If you didn't upload with `--control.push_to_hub=false`, you can also visualize it locally with (a window can be opened in the browser `http://127.0.0.1:9090` with the visualization tool):
```bash
python lerobot/scripts/visualize_dataset_html.py \
--repo-id ${HF_USER}/so100_test \
--local-files-only 1
```
## I. Replay an episode
Now try to replay the first episode on your robot:
```bash
python lerobot/scripts/control_robot.py \
--robot.type=so100 \
--control.type=replay \
--control.fps=30 \
--control.repo_id=${HF_USER}/so100_test \
--control.episode=0
```
## J. Train a policy
To train a policy to control your robot, use the [`python lerobot/scripts/train.py`](../lerobot/scripts/train.py) script. A few arguments are required. Here is an example command:
```bash
python lerobot/scripts/train.py \
--dataset.repo_id=${HF_USER}/so100_test \
--policy.type=act \
--output_dir=outputs/train/act_so100_test \
--job_name=act_so100_test \
--policy.device=cuda \
--wandb.enable=true
```
Let's explain it:
1. We provided the dataset as argument with `--dataset.repo_id=${HF_USER}/so100_test`.
2. We provided the policy with `policy.type=act`. This loads configurations from [`configuration_act.py`](../lerobot/common/policies/act/configuration_act.py). Importantly, this policy will automatically adapt to the number of motor sates, motor actions and cameras of your robot (e.g. `laptop` and `phone`) which have been saved in your dataset.
4. We provided `policy.device=cuda` since we are training on a Nvidia GPU, but you could use `policy.device=mps` to train on Apple silicon.
5. We provided `wandb.enable=true` to use [Weights and Biases](https://docs.wandb.ai/quickstart) for visualizing training plots. This is optional but if you use it, make sure you are logged in by running `wandb login`.
Training should take several hours. You will find checkpoints in `outputs/train/act_so100_test/checkpoints`.
To resume training from a checkpoint, below is an example command to resume from `last` checkpoint of the `act_so100_test` policy:
```bash
python lerobot/scripts/train.py \
--config_path=outputs/train/act_so100_test/checkpoints/last/pretrained_model/train_config.json \
--resume=true
```
## K. Evaluate your policy
You can use the `record` function from [`lerobot/scripts/control_robot.py`](../lerobot/scripts/control_robot.py) but with a policy checkpoint as input. For instance, run this command to record 10 evaluation episodes:
```bash
python lerobot/scripts/control_robot.py \
--robot.type=so100 \
--control.type=record \
--control.fps=30 \
--control.single_task="Grasp a lego block and put it in the bin." \
--control.repo_id=${HF_USER}/eval_act_so100_test \
--control.tags='["tutorial"]' \
--control.warmup_time_s=5 \
--control.episode_time_s=30 \
--control.reset_time_s=30 \
--control.num_episodes=10 \
--control.push_to_hub=true \
--control.policy.path=outputs/train/act_so100_test/checkpoints/last/pretrained_model
```
As you can see, it's almost the same command as previously used to record your training dataset. Two things changed:
1. There is an additional `--control.policy.path` argument which indicates the path to your policy checkpoint with (e.g. `outputs/train/eval_act_so100_test/checkpoints/last/pretrained_model`). You can also use the model repository if you uploaded a model checkpoint to the hub (e.g. `${HF_USER}/act_so100_test`).
2. The name of dataset begins by `eval` to reflect that you are running inference (e.g. `${HF_USER}/eval_act_so100_test`).
## L. More Information
Follow this [previous tutorial](https://github.com/huggingface/lerobot/blob/main/examples/7_get_started_with_real_robot.md#4-train-a-policy-on-your-data) for a more in-depth tutorial on controlling real robots with LeRobot.
> [!TIP]
> If you have any questions or need help, please reach out on [Discord](https://discord.com/invite/s3KuuzsPFb) in the channel [`#so100-arm`](https://discord.com/channels/1216765309076115607/1237741463832363039).
|
Run this script to launch manual calibration:
```bash
python lerobot/scripts/control_robot.py \
--robot.type=so100 \
--robot.cameras='{}' \
--control.type=calibrate \
--control.arms='["main_leader"]'
```
## F. Teleoperate
**Simple teleop**
Then you are ready to teleoperate your robot! Run this simple script (it won't connect and display the cameras):
```bash
python lerobot/scripts/control_robot.py \
--robot.type=so100 \
--robot.cameras='{}' \
--control.type=teleoperate
```
#### a. Teleop with displaying cameras
Follow [this guide to setup your cameras](https://github.com/huggingface/lerobot/blob/main/examples/7_get_started_with_real_robot.md#c-add-your-cameras-with-opencvcamera). Then you will be able to display the cameras on your computer while you are teleoperating by running the following code. This is useful to prepare your setup before recording your first dataset.
```bash
python lerobot/scripts/control_robot.py \
--robot.type=so100 \
--control.type=teleoperate
```
## G. Record a dataset
Once you're familiar with teleoperation, you can record your first dataset with SO-100.
If you want to use the Hugging Face hub features for uploading your dataset and you haven't previously done it, make sure you've logged in using a write-access token, which can be generated from the [Hugging Face settings](https://huggingface.co/settings/tokens):
```bash
huggingface-cli login --token ${HUGGINGFACE_TOKEN} --add-to-git-credential
```
Store your Hugging Face repository name in a variable to run these commands:
```bash
HF_USER=$(huggingface-cli whoami | head -n 1)
echo $HF_USER
```
Record 2 episodes and upload your dataset to the hub:
```bash
python lerobot/scripts/control_robot.py \
--robot.type=so100 \
--control.type=record \
--control.fps=30 \
--control.single_task="Grasp a lego block and put it in the bin." \
--control.repo_id=${HF_USER}/so100_test \
--control.tags='["so100","tutorial"]' \
--control.warmup_time_s=5 \
--control.episode_time_s=30 \
--control.reset_time_s=30 \
--control.num_episodes=2 \
--control.push_to_hub=true
```
Note: You can resume recording by adding `--control.resume=true`.
## H. Visualize a dataset
If you uploaded your dataset to the hub with `--control.push_to_hub=true`, you can [visualize your dataset online](https://huggingface.co/spaces/lerobot/visualize_dataset) by copy pasting your repo id given by:
```bash
echo ${HF_USER}/so100_test
```
If you didn't upload with `--control.push_to_hub=false`, you can also visualize it locally with (a window can be opened in the browser `http://127.0.0.1:9090` with the visualization tool):
```bash
python lerobot/scripts/visualize_dataset_html.py \
--repo-id ${HF_USER}/so100_test \
--local-files-only 1
```
## I. Replay an episode
Now try to replay the first episode on your robot:
```bash
python lerobot/scripts/control_robot.py \
--robot.type=so100 \
--control.type=replay \
--control.fps=30 \
--control.repo_id=${HF_USER}/so100_test \
--control.episode=0
```
## J. Train a policy
To train a policy to control your robot, use the [`python lerobot/scripts/train.py`](../lerobot/scripts/train.py) script. A few arguments are required. Here is an example command:
```bash
python lerobot/scripts/train.py \
--dataset.repo_id=${HF_USER}/so100_test \
--policy.type=act \
--output_dir=outputs/train/act_so100_test \
--job_name=act_so100_test \
--policy.device=cuda \
--wandb.enable=true
```
Let's explain it:
1. We provided the dataset as argument with `--dataset.repo_id=${HF_USER}/so100_test`.
2. We provided the policy with `policy.type=act`. This loads configurations from [`configuration_act.py`](../lerobot/common/policies/act/configuration_act.py). Importantly, this policy will automatically adapt to the number of motor sates, motor actions and cameras of your robot (e.g. `laptop` and `phone`) which have been saved in your dataset.
4. We provided `policy.device=cuda` since we are training on a Nvidia GPU, but you could use `policy.device=mps` to train on Apple silicon.
5. We provided `wandb.enable=true` to use [Weights and Biases](https://docs.wandb.ai/quickstart) for visualizing training plots. This is optional but if you use it, make sure you are logged in by running `wandb login`.
Training should take several hours. You will find checkpoints in `outputs/train/act_so100_test/checkpoints`.
To resume training from a checkpoint, below is an example command to resume from `last` checkpoint of the `act_so100_test` policy:
```bash
python lerobot/scripts/train.py \
--config_path=outputs/train/act_so100_test/checkpoints/last/pretrained_model/train_config.json \
--resume=true
```
## K. Evaluate your policy
You can use the `record` function from [`lerobot/scripts/control_robot.py`](../lerobot/scripts/control_robot.py) but with a policy checkpoint as input. For instance, run this command to record 10 evaluation episodes:
```bash
python lerobot/scripts/control_robot.py \
--robot.type=so100 \
--control.type=record \
--control.fps=30 \
--control.single_task="Grasp a lego block and put it in the bin." \
--control.repo_id=${HF_USER}/eval_act_so100_test \
--control.tags='["tutorial"]' \
--control.warmup_time_s=5 \
--control.episode_time_s=30 \
--control.reset_time_s=30 \
--control.num_episodes=10 \
--control.push_to_hub=true \
--control.policy.path=outputs/train/act_so100_test/checkpoints/last/pretrained_model
```
As you can see, it's almost the same command as previously used to record your training dataset. Two things changed:
1. There is an additional `--control.policy.path` argument which indicates the path to your policy checkpoint with (e.g. `outputs/train/eval_act_so100_test/checkpoints/last/pretrained_model`). You can also use the model repository if you uploaded a model checkpoint to the hub (e.g. `${HF_USER}/act_so100_test`).
2. The name of dataset begins by `eval` to reflect that you are running inference (e.g. `${HF_USER}/eval_act_so100_test`).
## L. More Information
Follow this [previous tutorial](https://github.com/huggingface/lerobot/blob/main/examples/7_get_started_with_real_robot.md#4-train-a-policy-on-your-data) for a more in-depth tutorial on controlling real robots with LeRobot.
> [!TIP]
> If you have any questions or need help, please reach out on [Discord](https://discord.com/invite/s3KuuzsPFb) in the channel [`#so100-arm`](https://discord.com/channels/1216765309076115607/1237741463832363039).